
Register an app
First create a developer account at dev.splashifypro.com. Then register each app that will connect to Splashify Pro accounts. You get a public Client ID and a client secret for your server.
Create the app
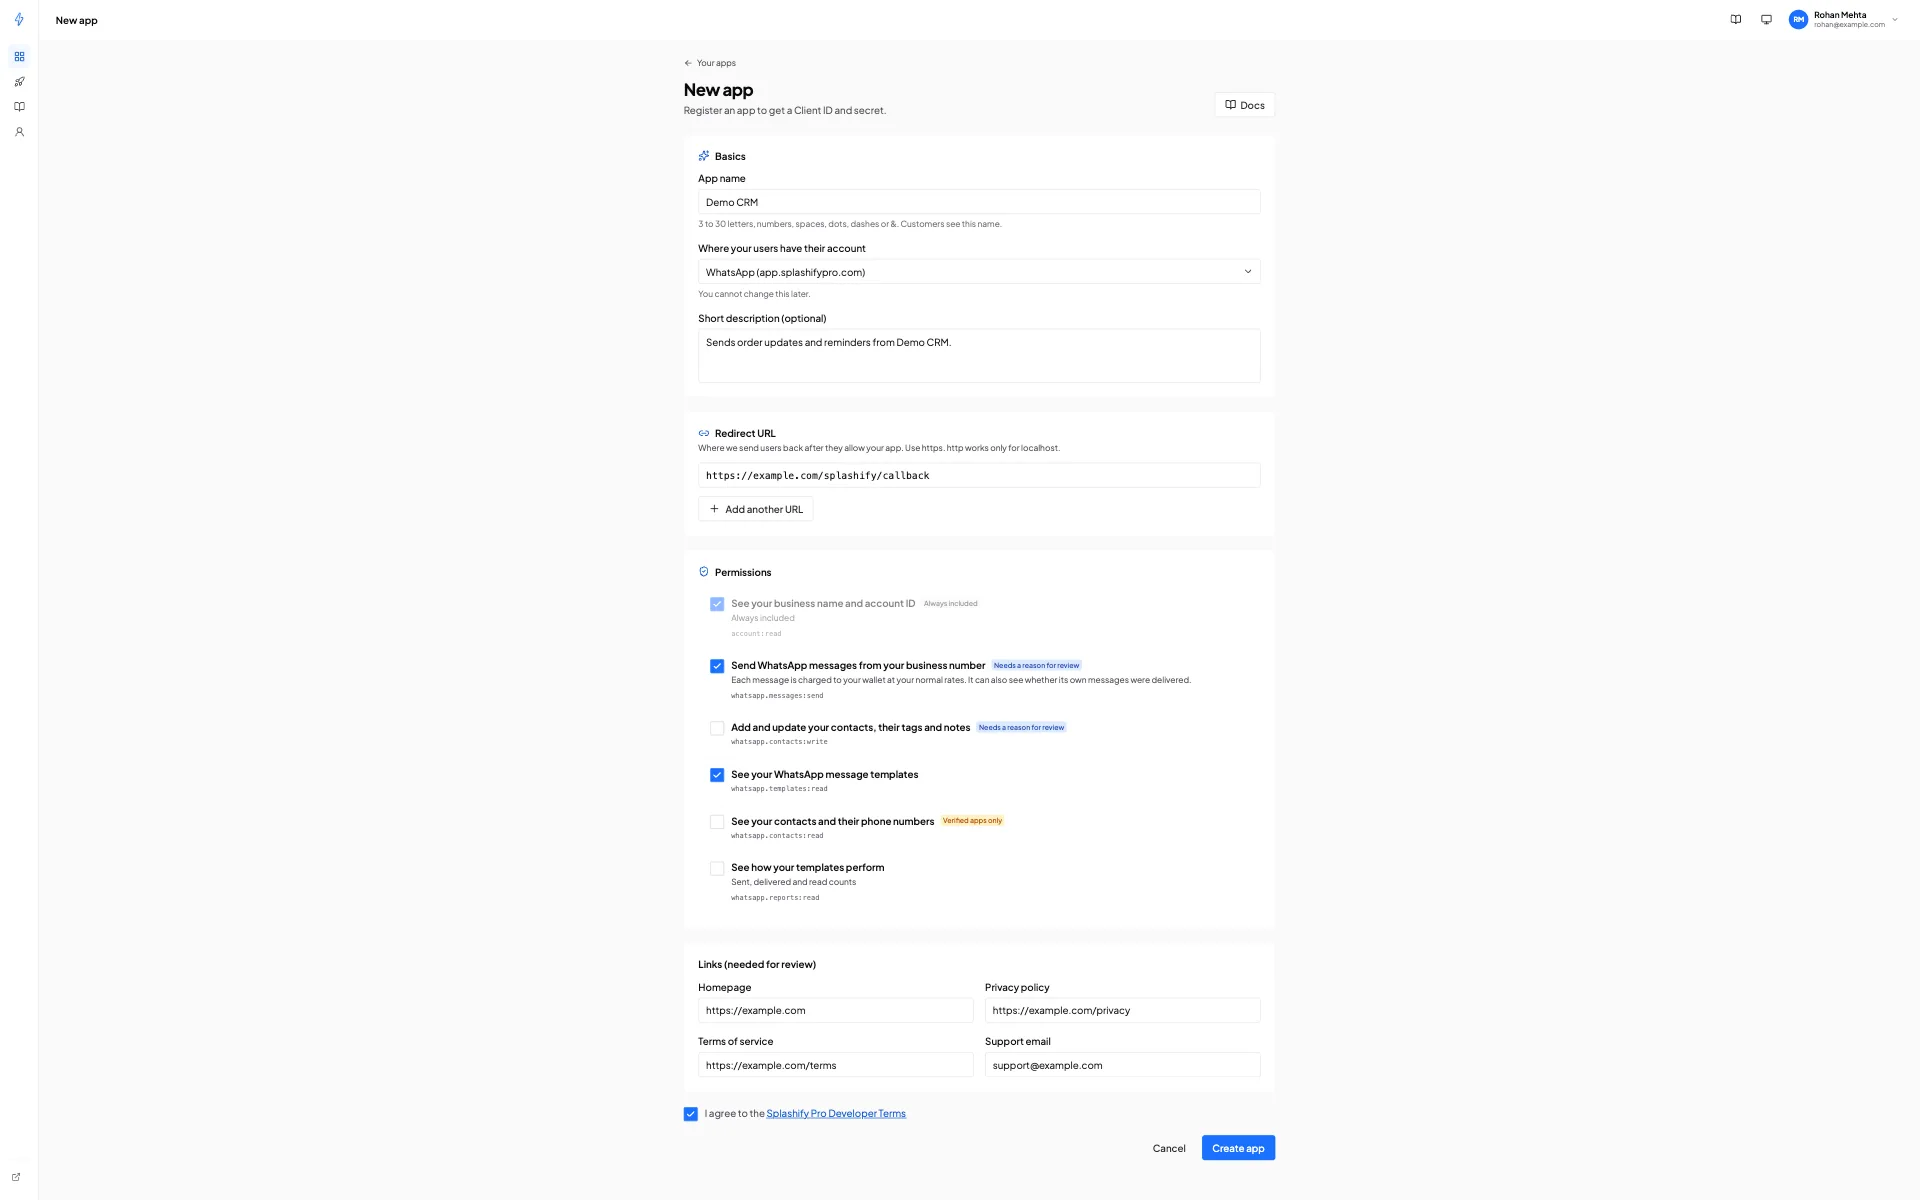
In the console, click New app and fill in:
Tick I agree to the Splashify Pro Developer Terms and click Create app. You can have up to 10 apps.
Redirect URL rules
https://only.http://works only forlocalhost,127.0.0.1and[::1](any port), for local testing.- A real host name with a dot. No IP addresses (other than the local ones above), no
*, no#fragmentand nouser:password@. - No host on
splashifypro.comor our other domains. - A query string is allowed. The
redirect_uriyou send must match a registered one exactly, character for character.
Client ID and secrets
Your Client ID starts with spo_app_. It is public: it goes in the authorize link.
The client secret starts with spo_cs_. We show it once, right after you create the app or a new secret. Copy it to your server's secret store. If you lose it, create a new one.
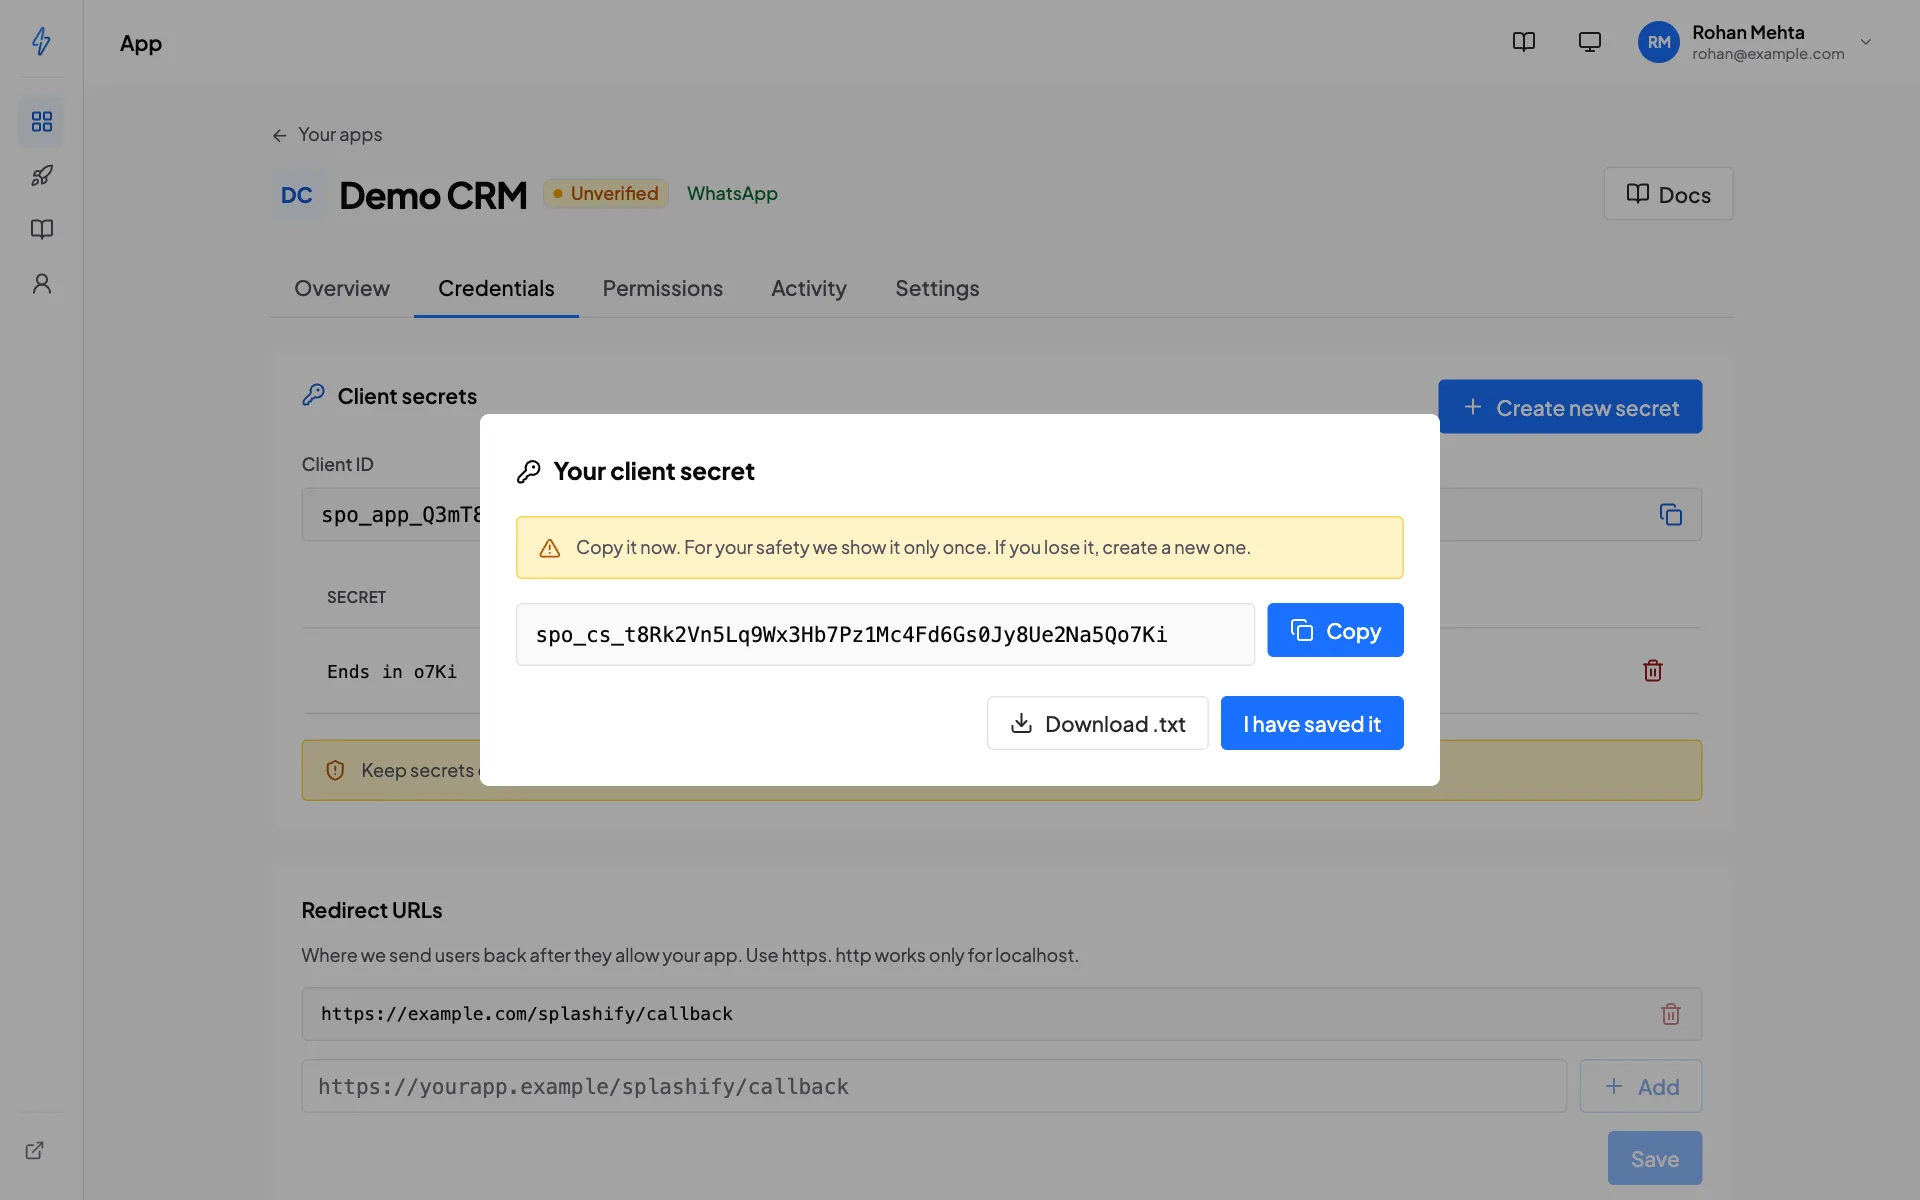
- You can have two secrets at a time, so you can switch to a new one without downtime: create the new one, deploy it, then delete the old one.
- Deleting a secret stops it at once.
- We email you whenever a new secret is created.
- Keep secrets on your server only. Never put them in a browser or a mobile app.
Statuses and limits
A "send" is one call to a sending route (POST /api/v1/public/message, or the Email send routes). After a verified app loses its badge (see App review), it keeps the verified limits while we check it again.
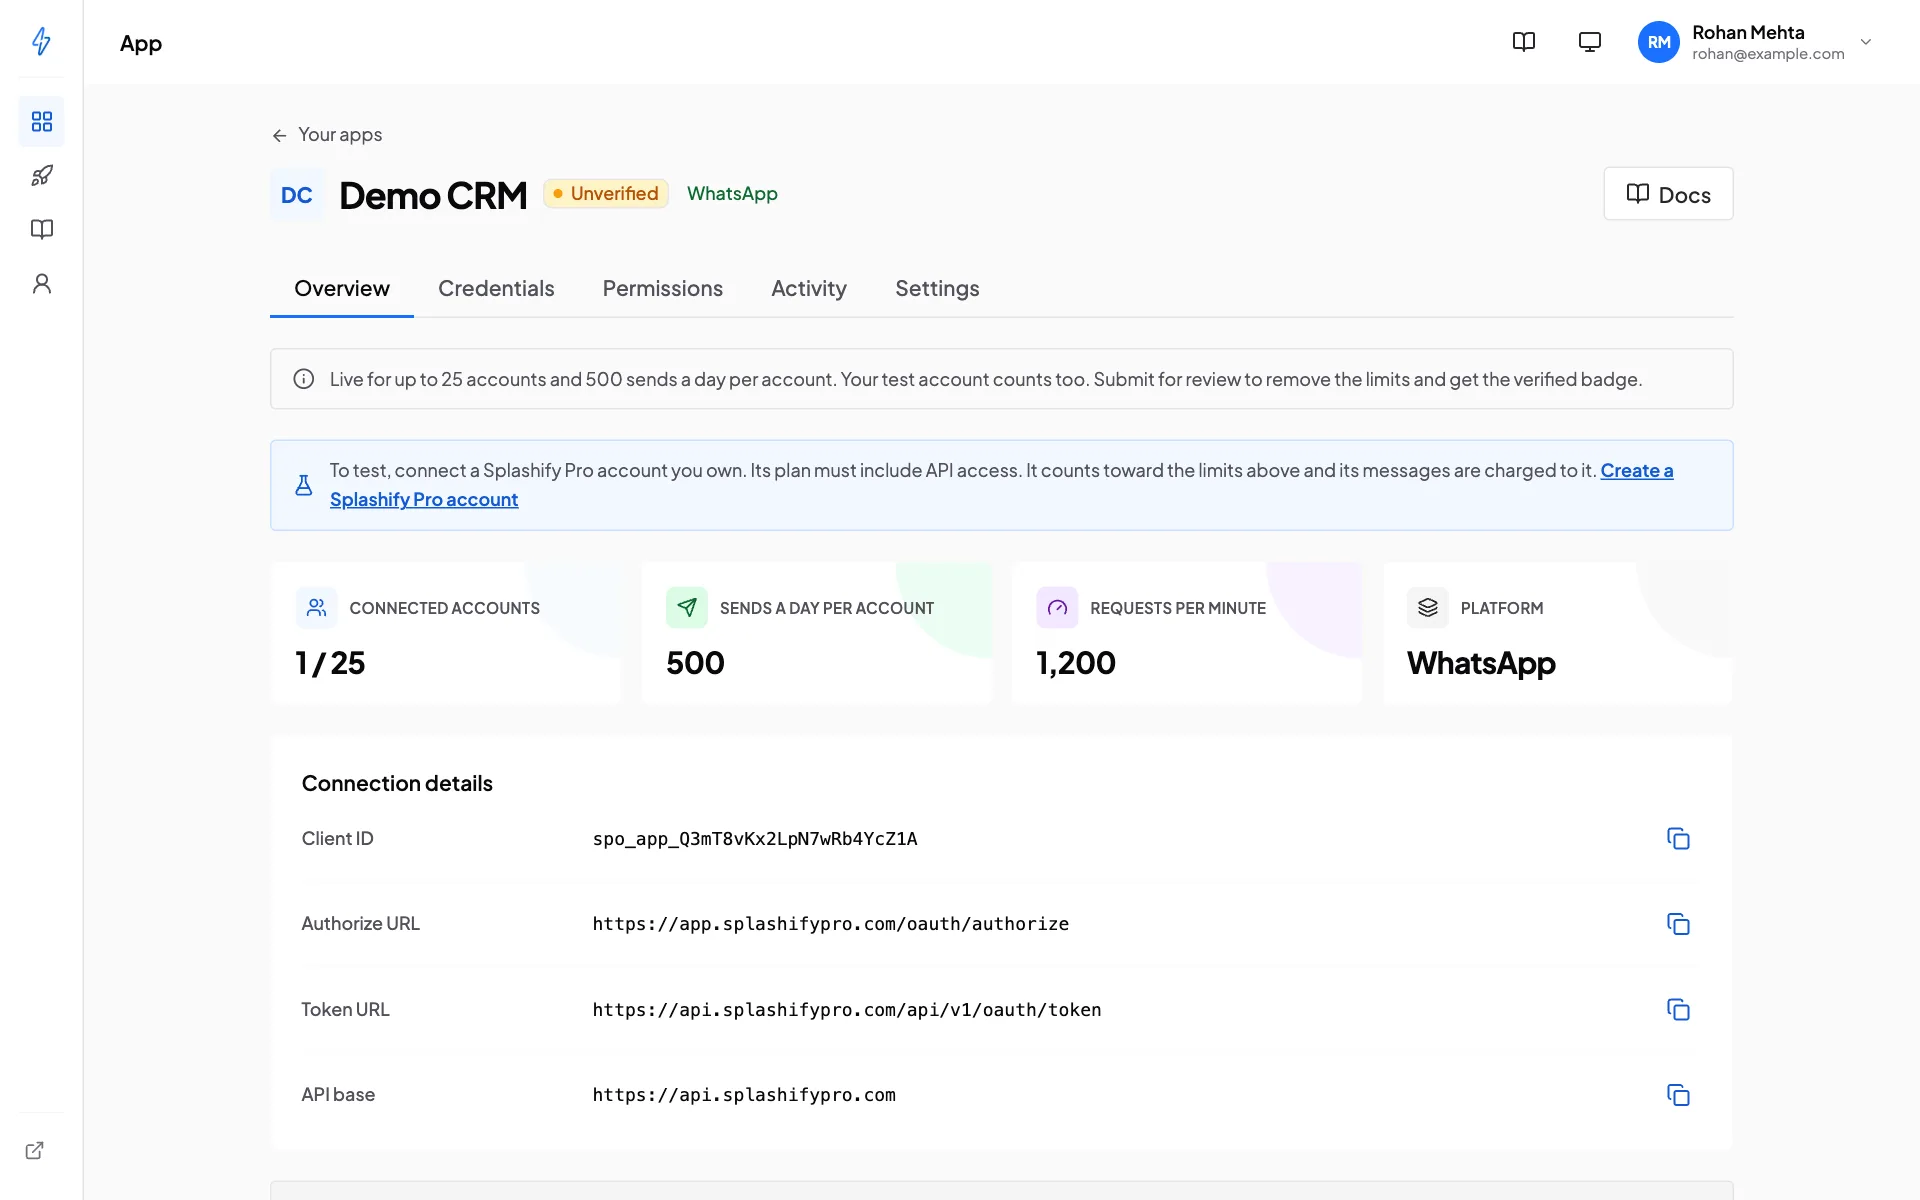
The Overview tab of your app shows the status, how many accounts are connected, the daily send limit and the request limit, plus your authorize URL and an example sign-in link.
Test your app
Connect a Splashify Pro account you own through the normal consent screen:
- WhatsApp app: an app.splashifypro.com account whose plan includes API access. Create a Splashify Pro account.
- Email app: a Splashify Pro Email account. Create a Splashify Pro Email account.
There is no test mode: your test account counts toward the 25 account limit and the 500 sends a day limit, every message it sends is charged to it at its normal rates, and permissions that need a verified app work only after your app is verified.
Change or delete the app
- Settings tab: name, description, logo, links and the server IP addresses your app calls from. On a verified app, some changes remove the badge until we check again; the page asks first.
- Credentials tab: secrets and redirect URLs.
- Permissions tab: permissions, the reason for each one, and Submit for review.
- Activity tab: what happened to the app each month (connections, secrets, reviews). Account ids are shortened; we never show your users' names or addresses.
- Delete app (Settings tab): type the app name to confirm. Every connected account is disconnected and your tokens stop working. The name stays reserved for 30 days.