
WooCommerce (older setup)
New store? Connect it in one click
New stores connect with WooCommerce: type your store address, approve access in your store, and we set up the rest. This page is for stores that already use the older setup with their own keys and webhooks.
With this setup every customer gets a WhatsApp message when they place an order, and again when the order status changes, for example to shipped or completed. In the app it is called WooCommerce (older setup).
Before you start
- A site with WooCommerce, and an admin (or shop manager) login.
- Your site must be on the public internet. A store on your own computer cannot reach us.
- An approved WhatsApp template for each message, for example an order confirmation. See Create a WhatsApp template. Most templates are approved within 24 hours.
- At checkout, ask customers for a phone number. The message goes to the billing phone.
Where to find your WooCommerce keys
Connect WooCommerce
Open WooCommerce in the app
In the left sidebar, click Integrations. Under Connected, click WooCommerce (older setup).
Add your WooCommerce keys
Under Add your WooCommerce (older setup) keys, fill in Store URL, Consumer Key, Consumer Secret and Webhook Secret.
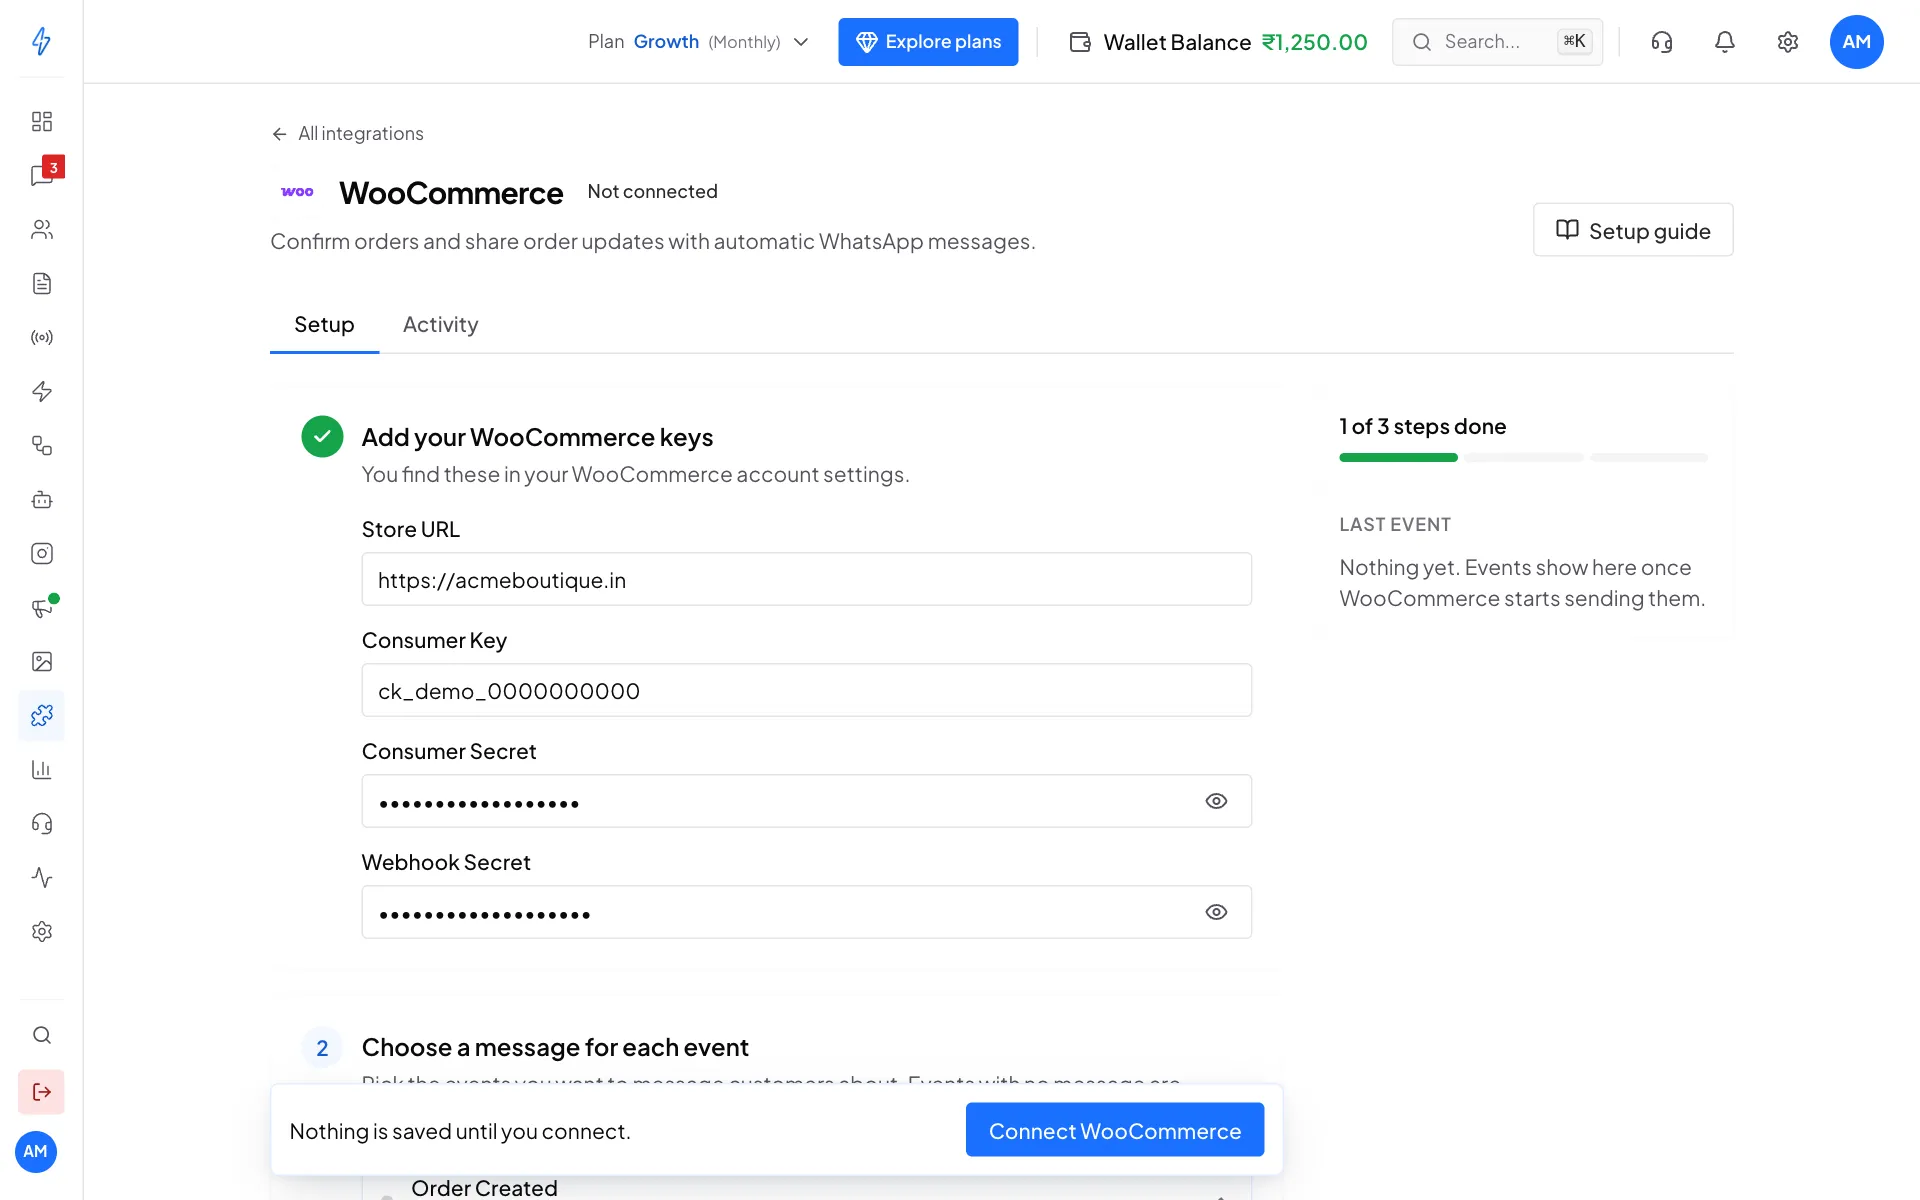
Step 1: the store URL, the REST API keys and your webhook secret Choose a message for each event
Under Choose a message for each event there are two events:
- Order Created: a new order was placed.
- Order Updated: an order changed, for example its status moved to processing or completed.
Click an event, pick a Template, leave Send it to on Customer Phone, and under Fill the variables pick what fills each blank, for example Customer First Name, Order Number and Order Total. Check the Preview.
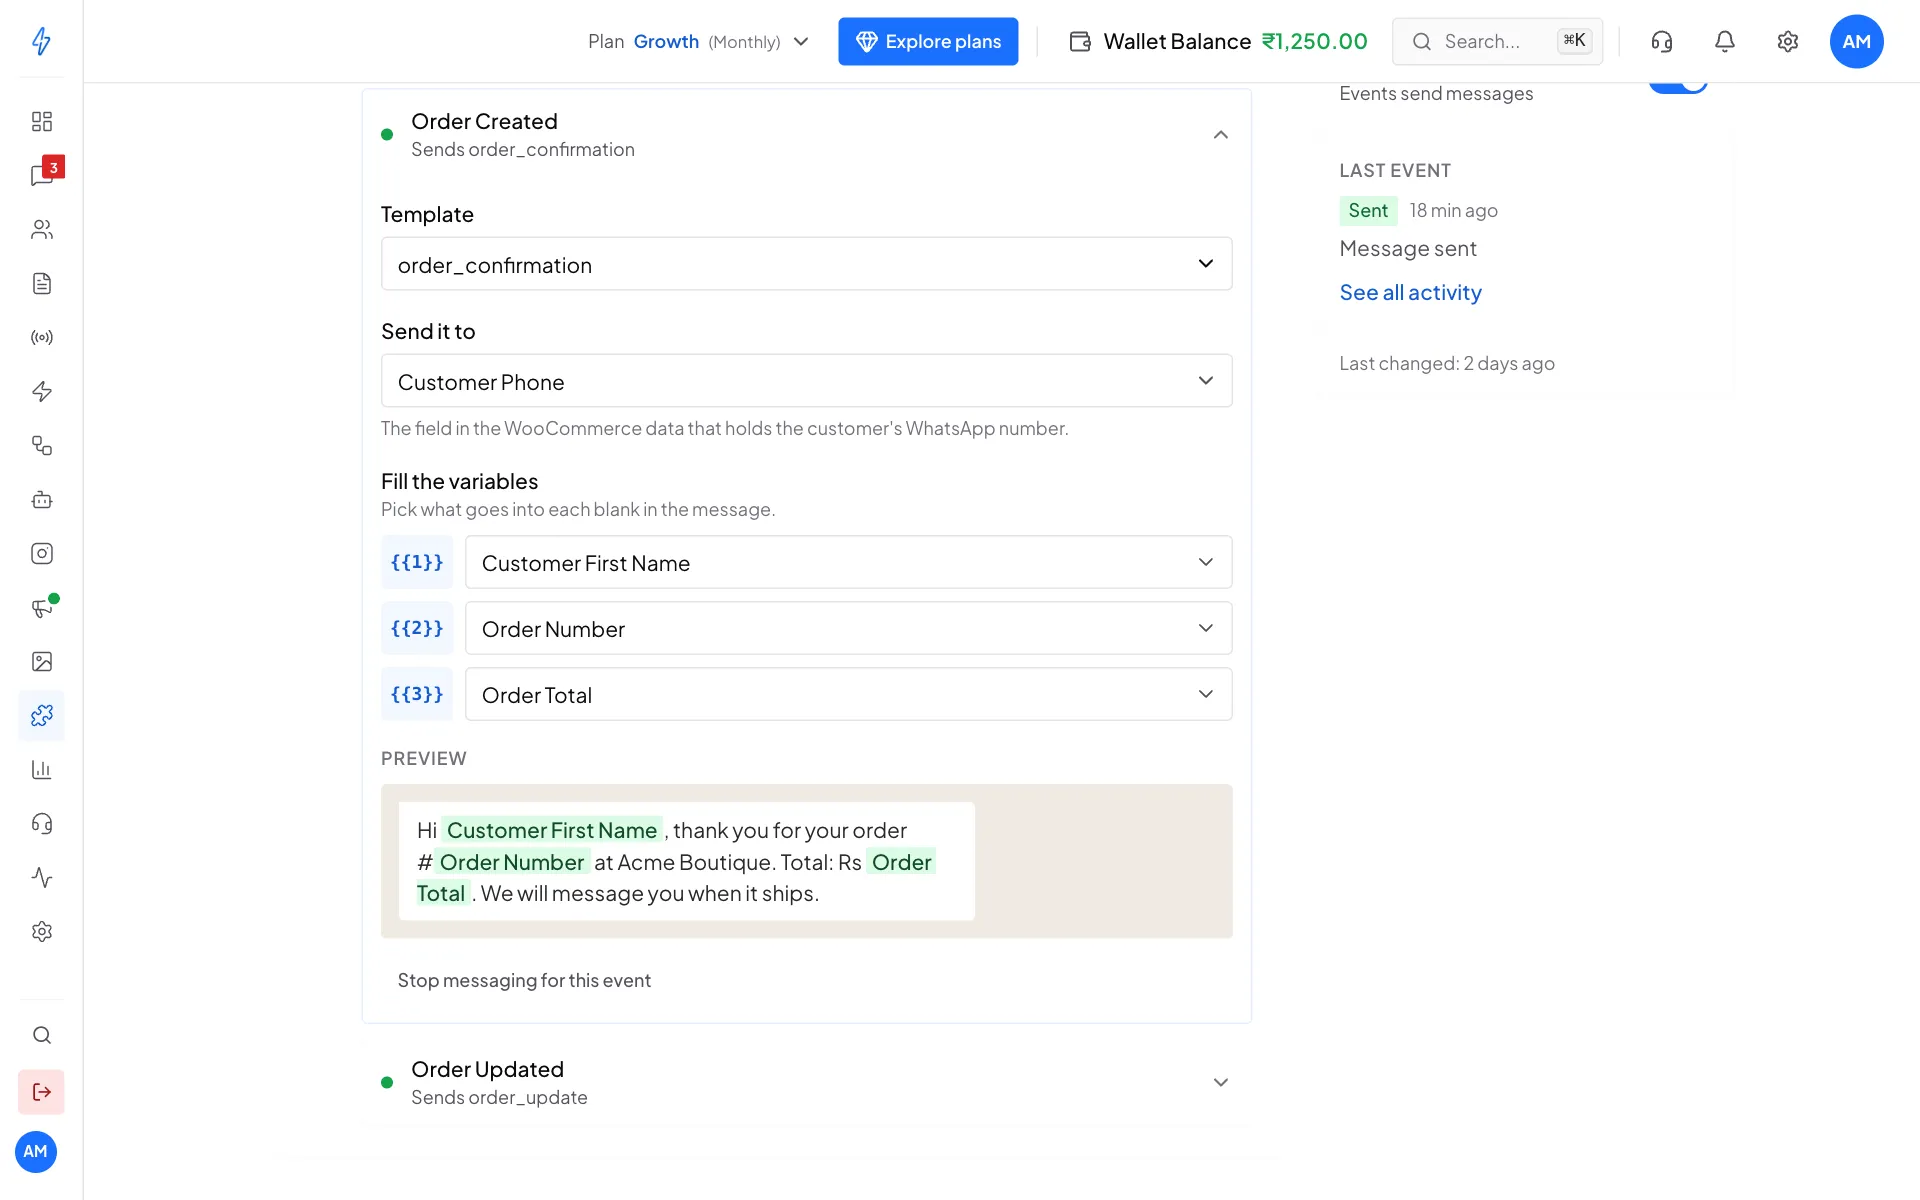
Step 2: one template for each event Click Connect
Click Connect WooCommerce (older setup) in the bar at the bottom. You will see WooCommerce (older setup) is connected.
Copy the webhook URL
Under Paste this URL in WooCommerce (older setup), click the copy button next to the URL.
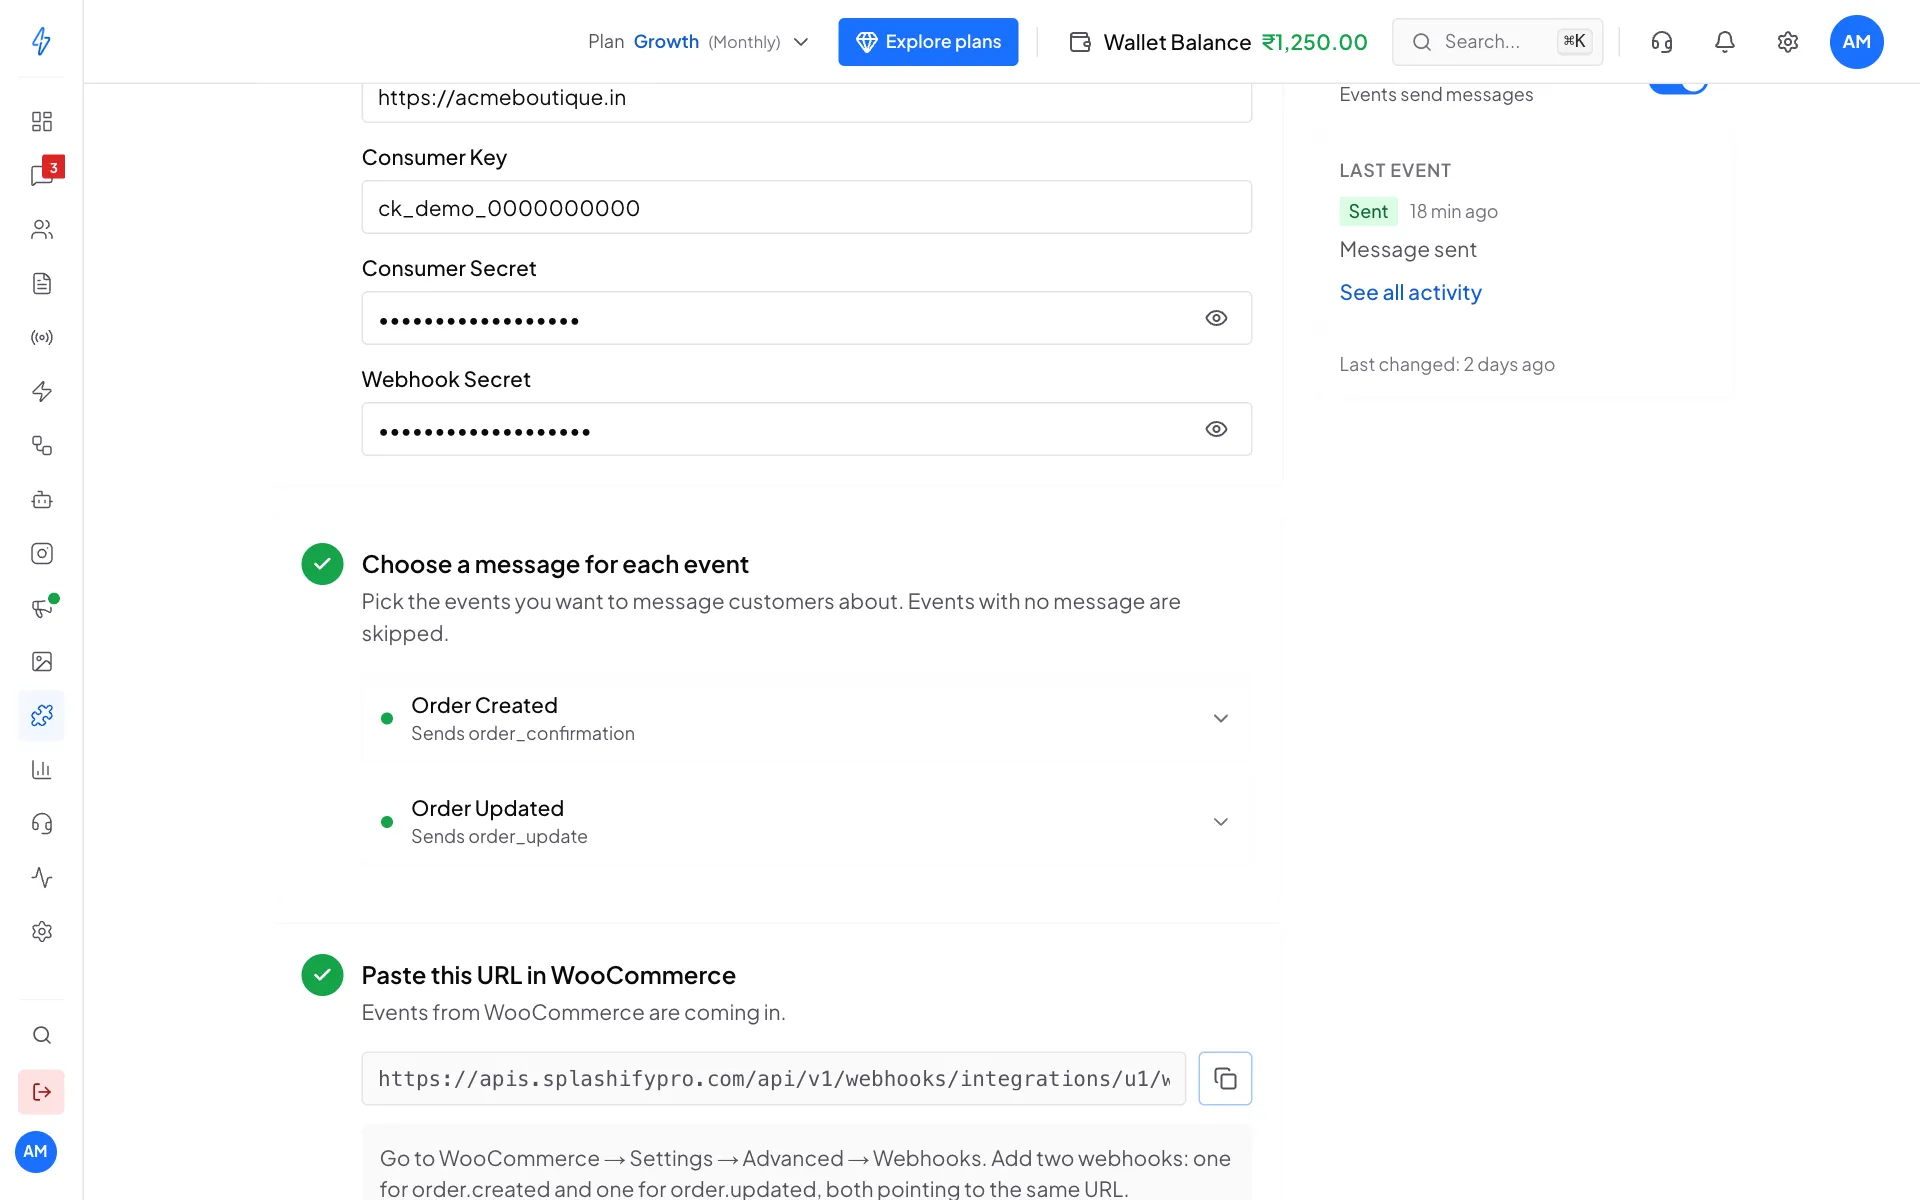
Step 3: copy the URL. You add it to WooCommerce twice Add two webhooks in WooCommerce
In your site admin, open WooCommerce, then Settings, then Advanced, then Webhooks, and click Add webhook. Fill it in and click Save webhook:
- Name: anything, for example WhatsApp order created.
- Status: Active.
- Topic: Order created.
- Delivery URL: paste the URL you copied.
- Secret: the same Webhook Secret you typed in our app.
Add a second webhook the same way, with Topic set to Order updated. Use the same URL and the same secret for both.
Check that it works
Place a test order on your store with a real phone number. On the WooCommerce (older setup) page in our app, open the Activity tab. You should see Sent, Message sent.
When you save a webhook, WooCommerce sends a test ping. It shows in Activity as Received, Event received. That is normal.
What you can put in the message
Order Updated fires often
WooCommerce sends Order updated for every change to an order, not only status changes. Put Order Status in that message, so each update tells the customer where their order is.
Change, pause or disconnect
- Change a message: open the event, make your change, then click Save changes at the bottom.
- Pause: switch Active off on the right. Orders are ignored until you switch it back on.
- Disconnect: click the ⋮ button at the top right, then Disconnect, and confirm. Also delete the two webhooks in WooCommerce.
If a message did not go out
Open the Activity tab.
More fixes are in Troubleshooting.
Related
- WooCommerce, the one-click connect
- Integrations overview
- Troubleshooting