
Single sign-on (SSO)
With single sign-on, your team signs in with the work account they already use, from Microsoft, Google Workspace or Okta. They do not need a separate password here. When your IT team turns off someone's work account, their access here ends too.
Only the account owner can set this up. A team member who opens the page sees Only the account owner can change this.
Open single sign-on
Open Settings (the gear icon in the left sidebar or the top bar) and click Single Sign-On. The page has three steps, done in order: verify your email domain, connect your provider, then turn it on. The badge next to the title shows Not set up, Ready to turn on or On.
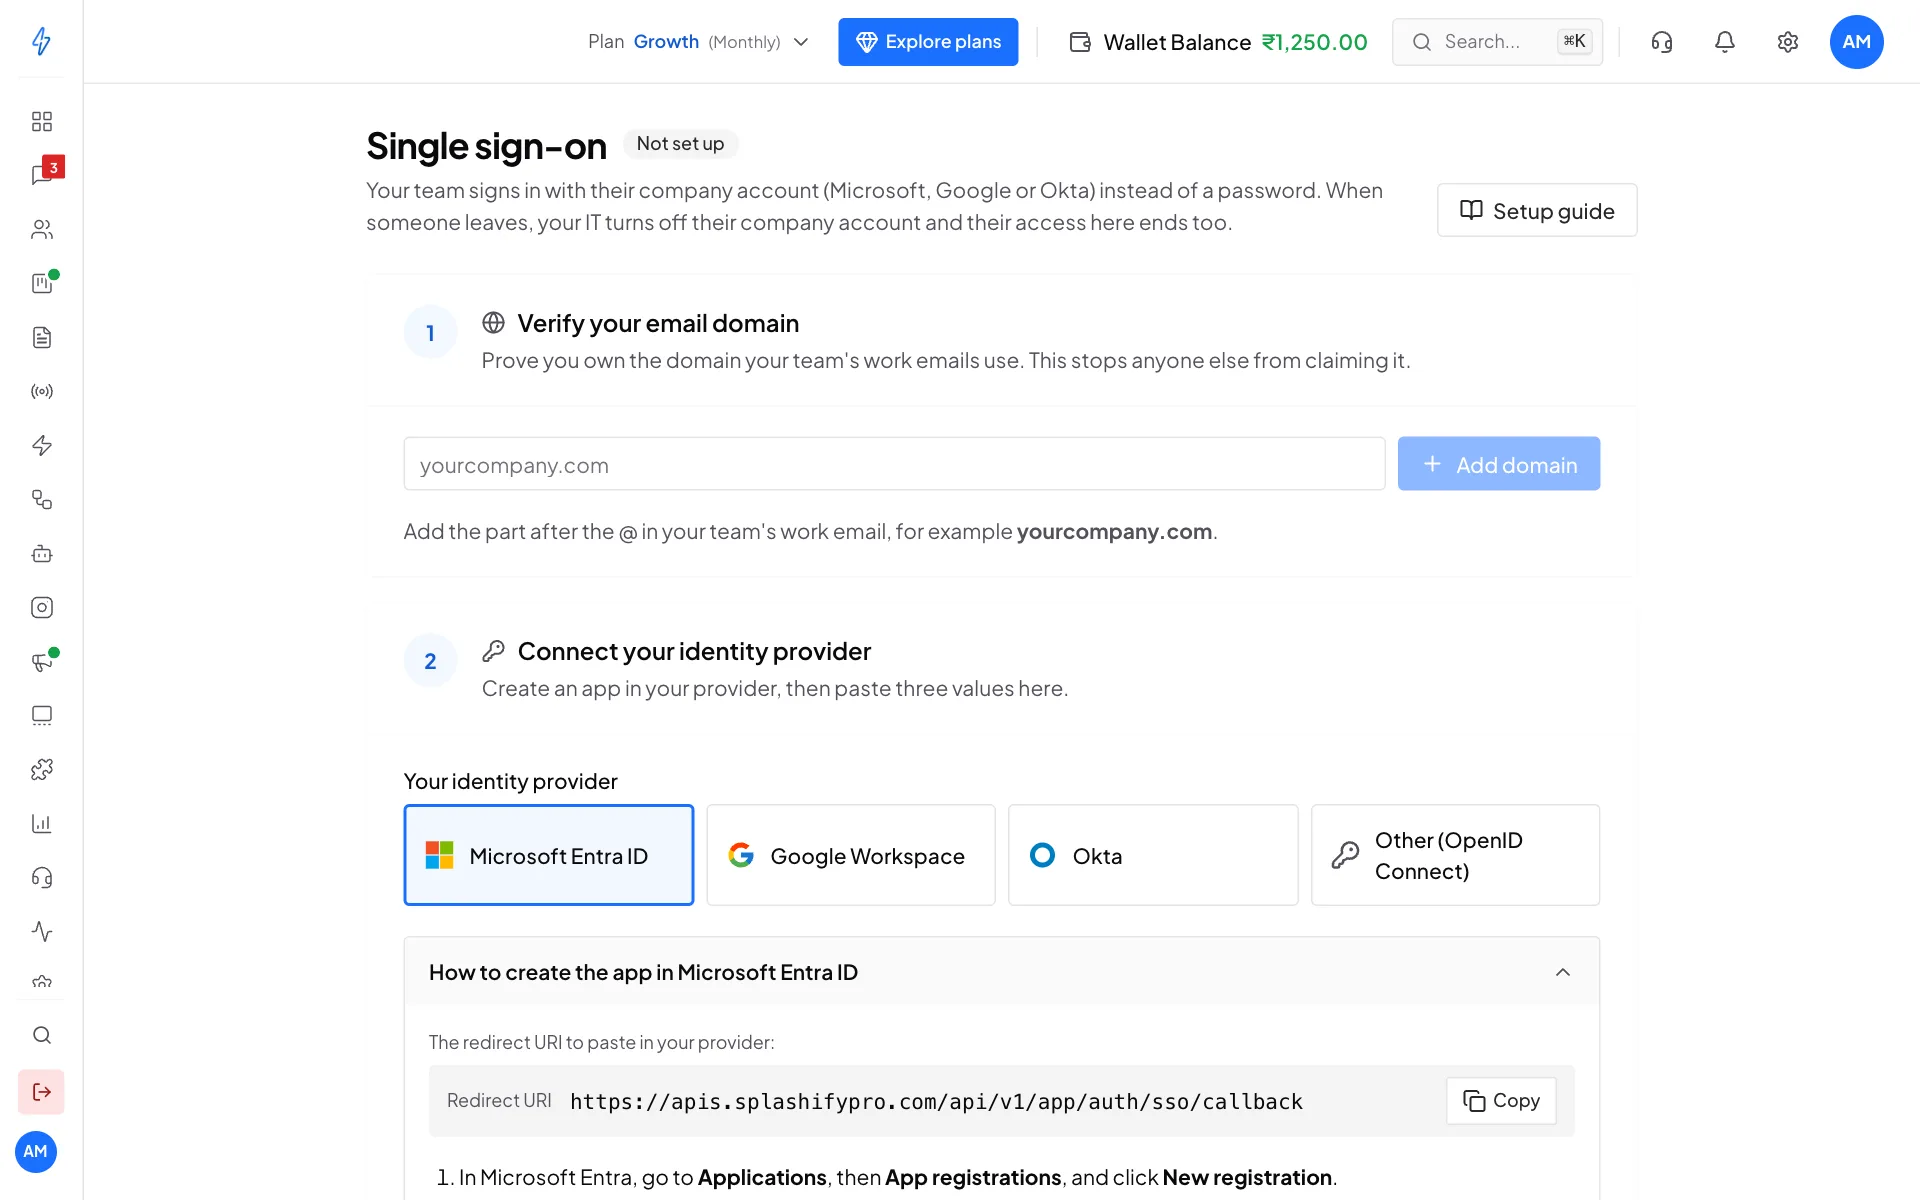
Ask your IT person to help
Steps 1 and 2 need someone who can change your domain's DNS and create an app in Microsoft, Google or Okta. Send them this page.
Step 1: Verify your email domain
This proves your business owns the domain in your team's work emails, like acmeboutique.in. It stops anyone else from claiming it.
Add your domain
Under Verify your email domain, type the part after the @ in your team's email, for example
acmeboutique.in. Click Add domain. It shows Waiting for DNS record.Add the TXT record
The page shows a record with three values: Type, Name and Value. Each has a Copy button. Open the place where you manage your domain's DNS (GoDaddy, Cloudflare, Hostinger and so on) and add a new record with these values. Copy them rather than typing them, so no character is wrong.
If your DNS panel wants the full name, use the name followed by your domain. The page shows it under the record.
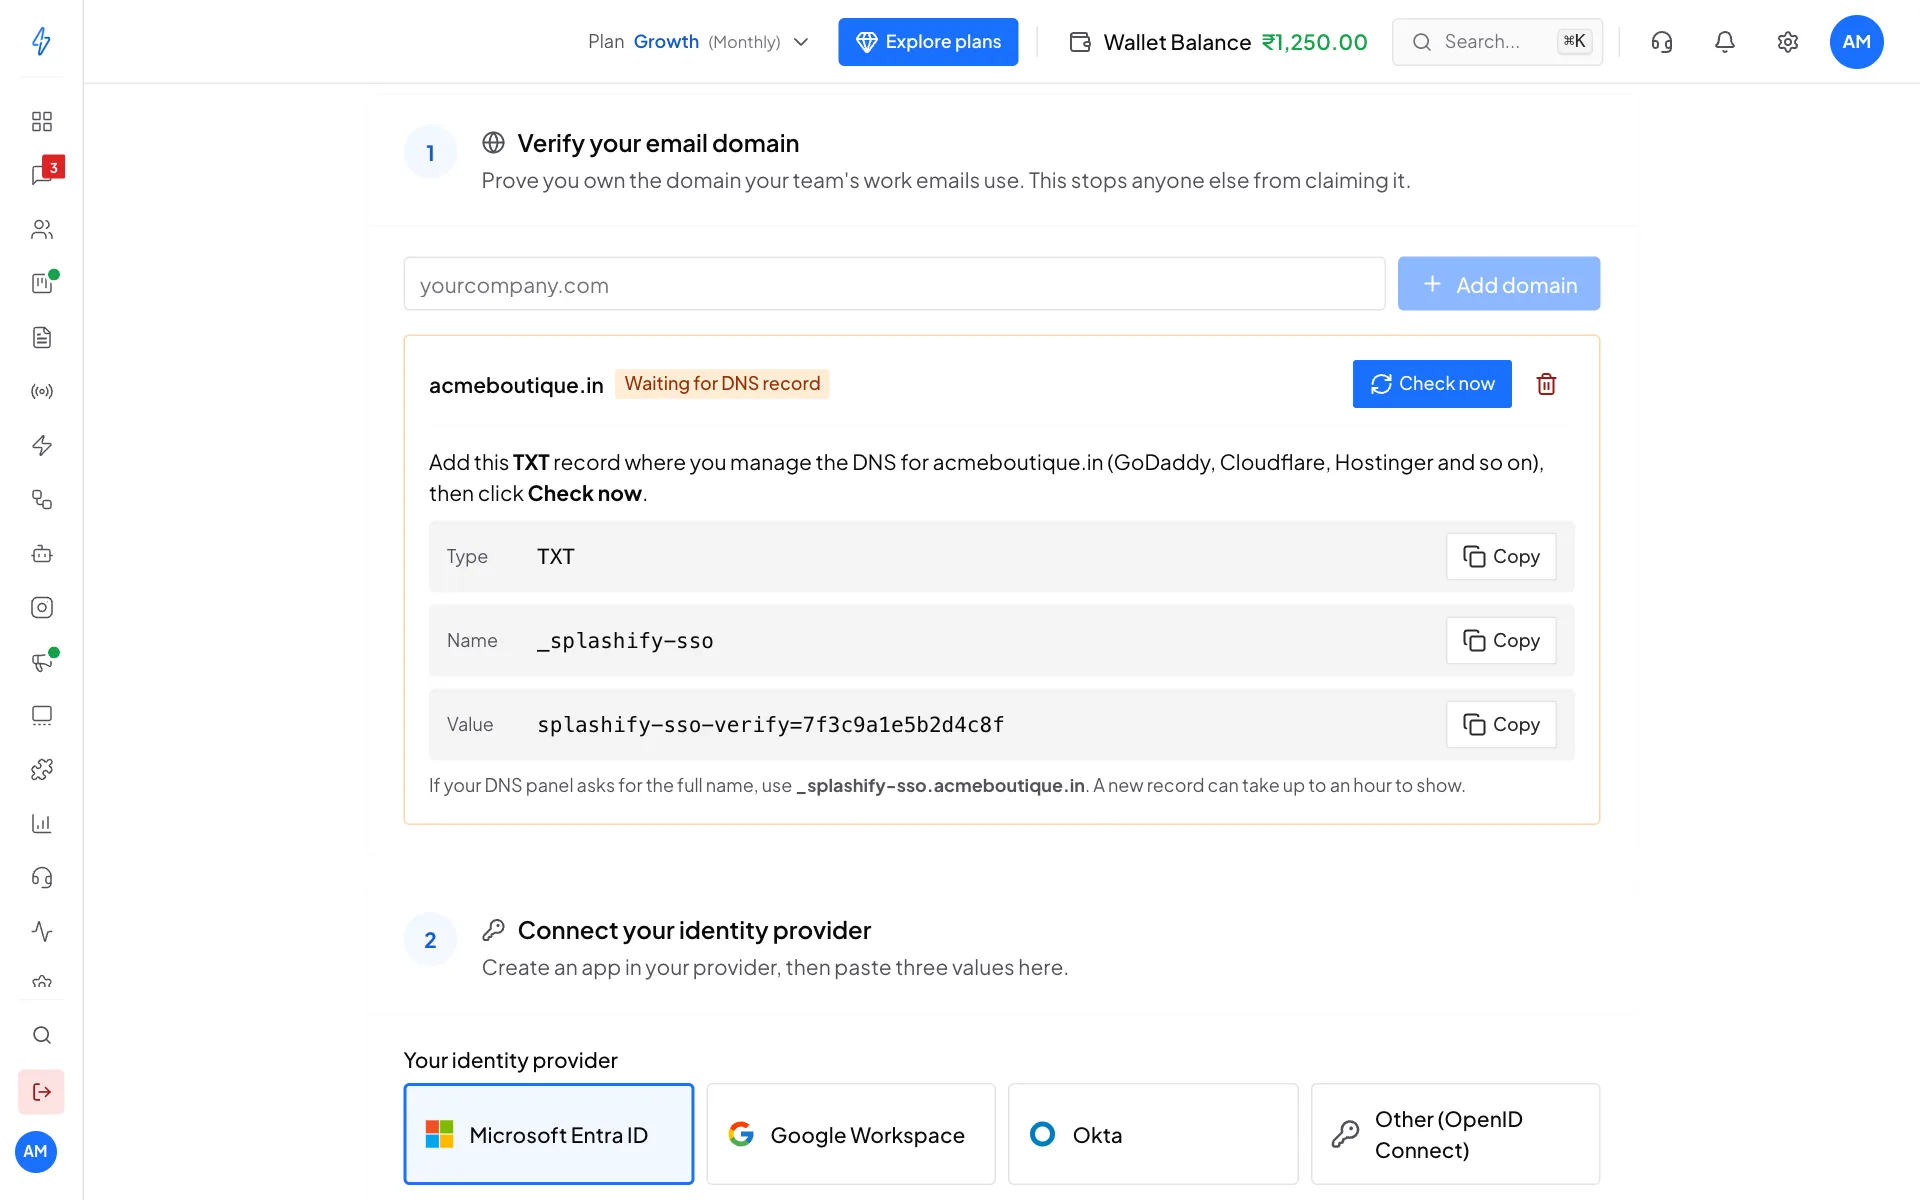
Copy each value into your DNS panel Click Check now
Back on this page, click Check now. When the record is found, the domain shows Verified and step 1 shows Done.
Not verified yet?
A new DNS record can take up to an hour to show. Wait a little and click Check now again. If it still fails, check that the name and value match the page exactly.
You can add more than one domain. To remove one, click the bin next to it. People with that domain go back to signing in with a password. If it was your last verified domain, single sign-on switches off.
Step 2: Connect your provider
Pick your provider
Under Your identity provider, click Microsoft Entra ID, Google Workspace, Okta or Other (OpenID Connect).
Create the app in your provider
Open How to create the app in Microsoft Entra ID (it shows the provider you picked). It lists the exact clicks to make in your provider, and has a button to open your provider's admin page.
Copy the Redirect URI with its Copy button and paste it into your provider when the steps ask for it.
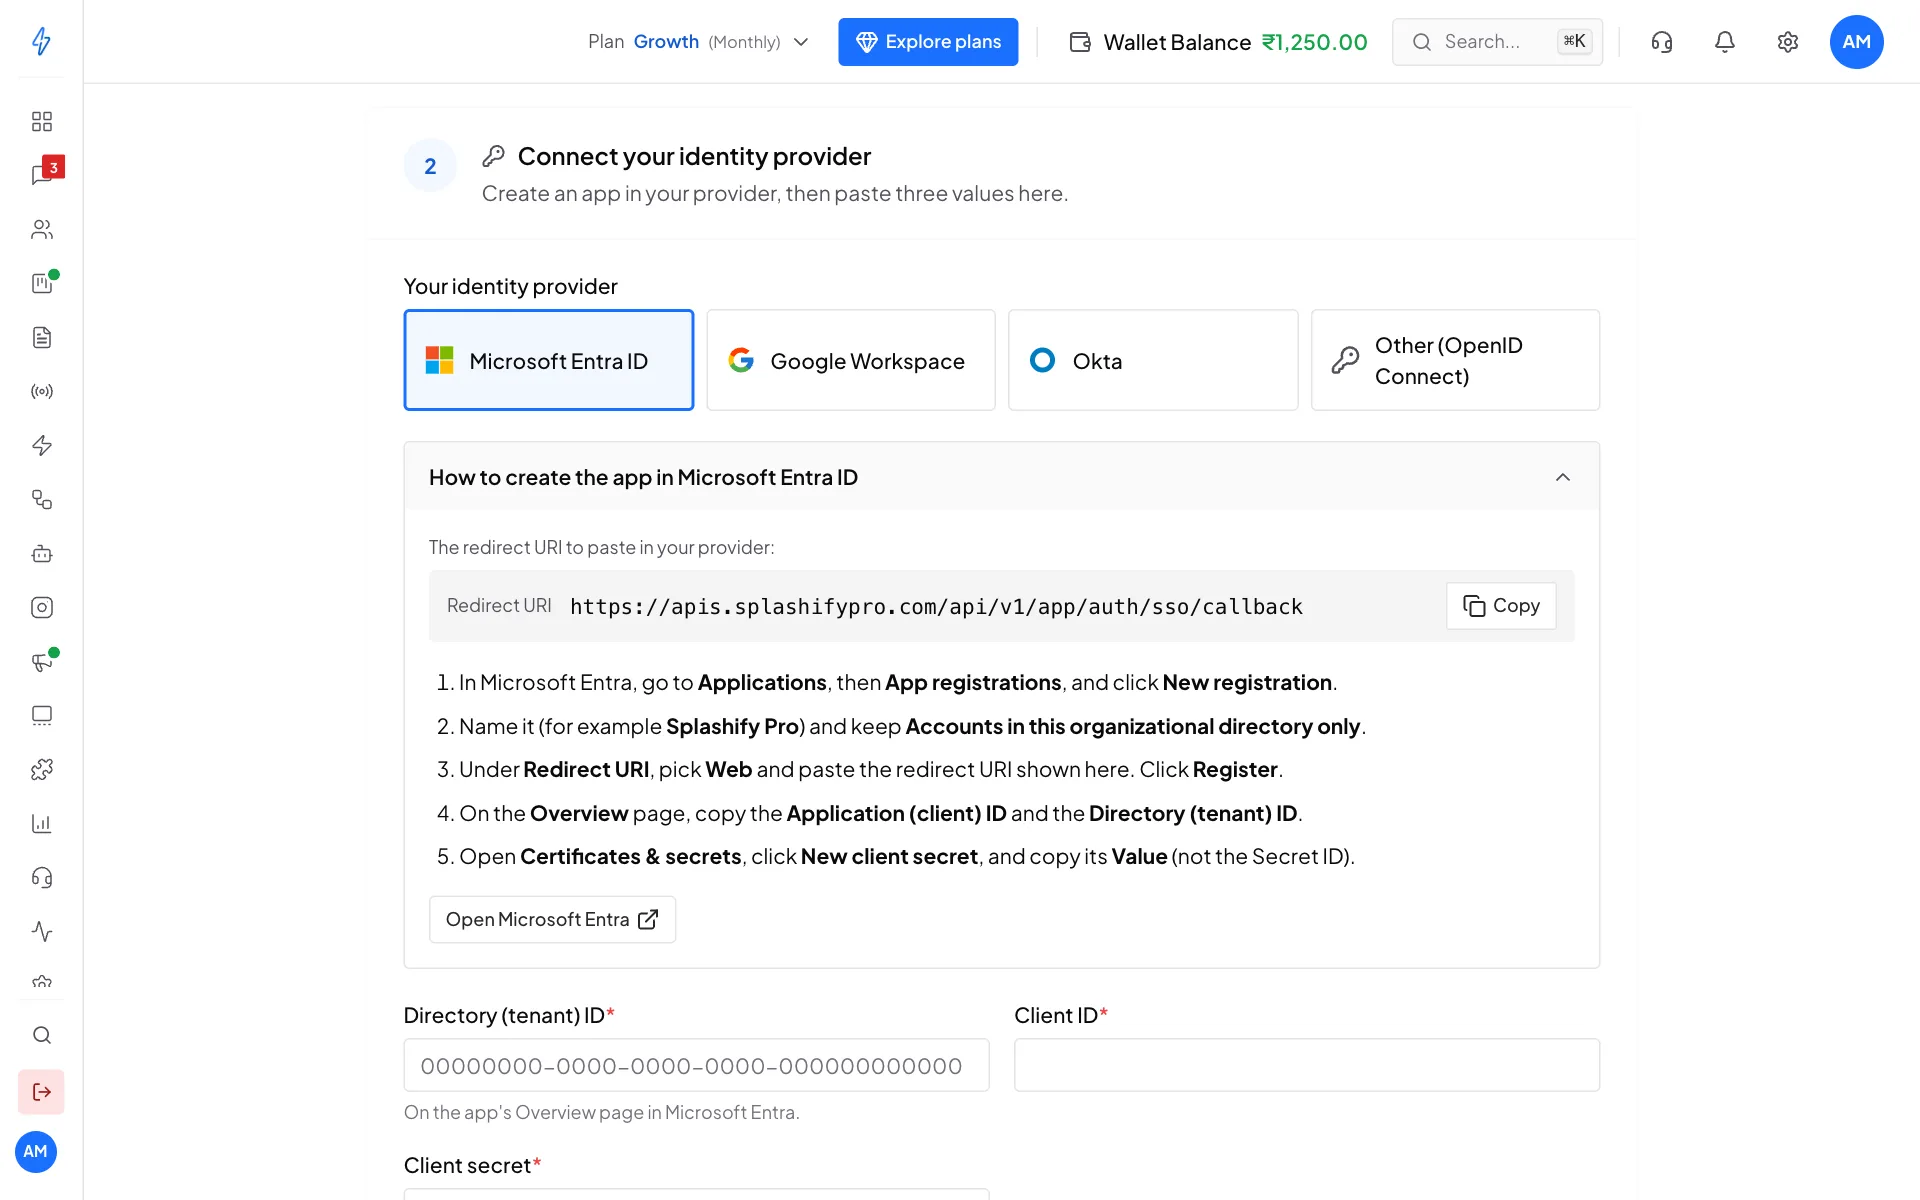
Follow the steps for your provider Fill in the details
Copy these values from your provider into the boxes below:
- Directory (tenant) ID: for Microsoft only. It is on the app's Overview page in Microsoft Entra.
- Okta domain: for Okta only, for example
acmeboutique.okta.com. - Issuer URL: for Other (OpenID Connect) only.
- Client ID: for every provider.
- Client secret: for every provider. Your provider shows it only once, so copy it straight in.
Click Save connection
Click Save connection. Step 2 shows Done.
Your client secret is stored safely and is never shown again, not even to you. To change it later, type a new one and click Save connection. Leave the box empty to keep the saved one.
Test before you turn it on
After you save, a Test sign-in button appears under step 2. Click it and sign in with your own work account. Nobody else is affected, even before you turn it on.
When it works, you come back to this page and see Test sign-in worked.
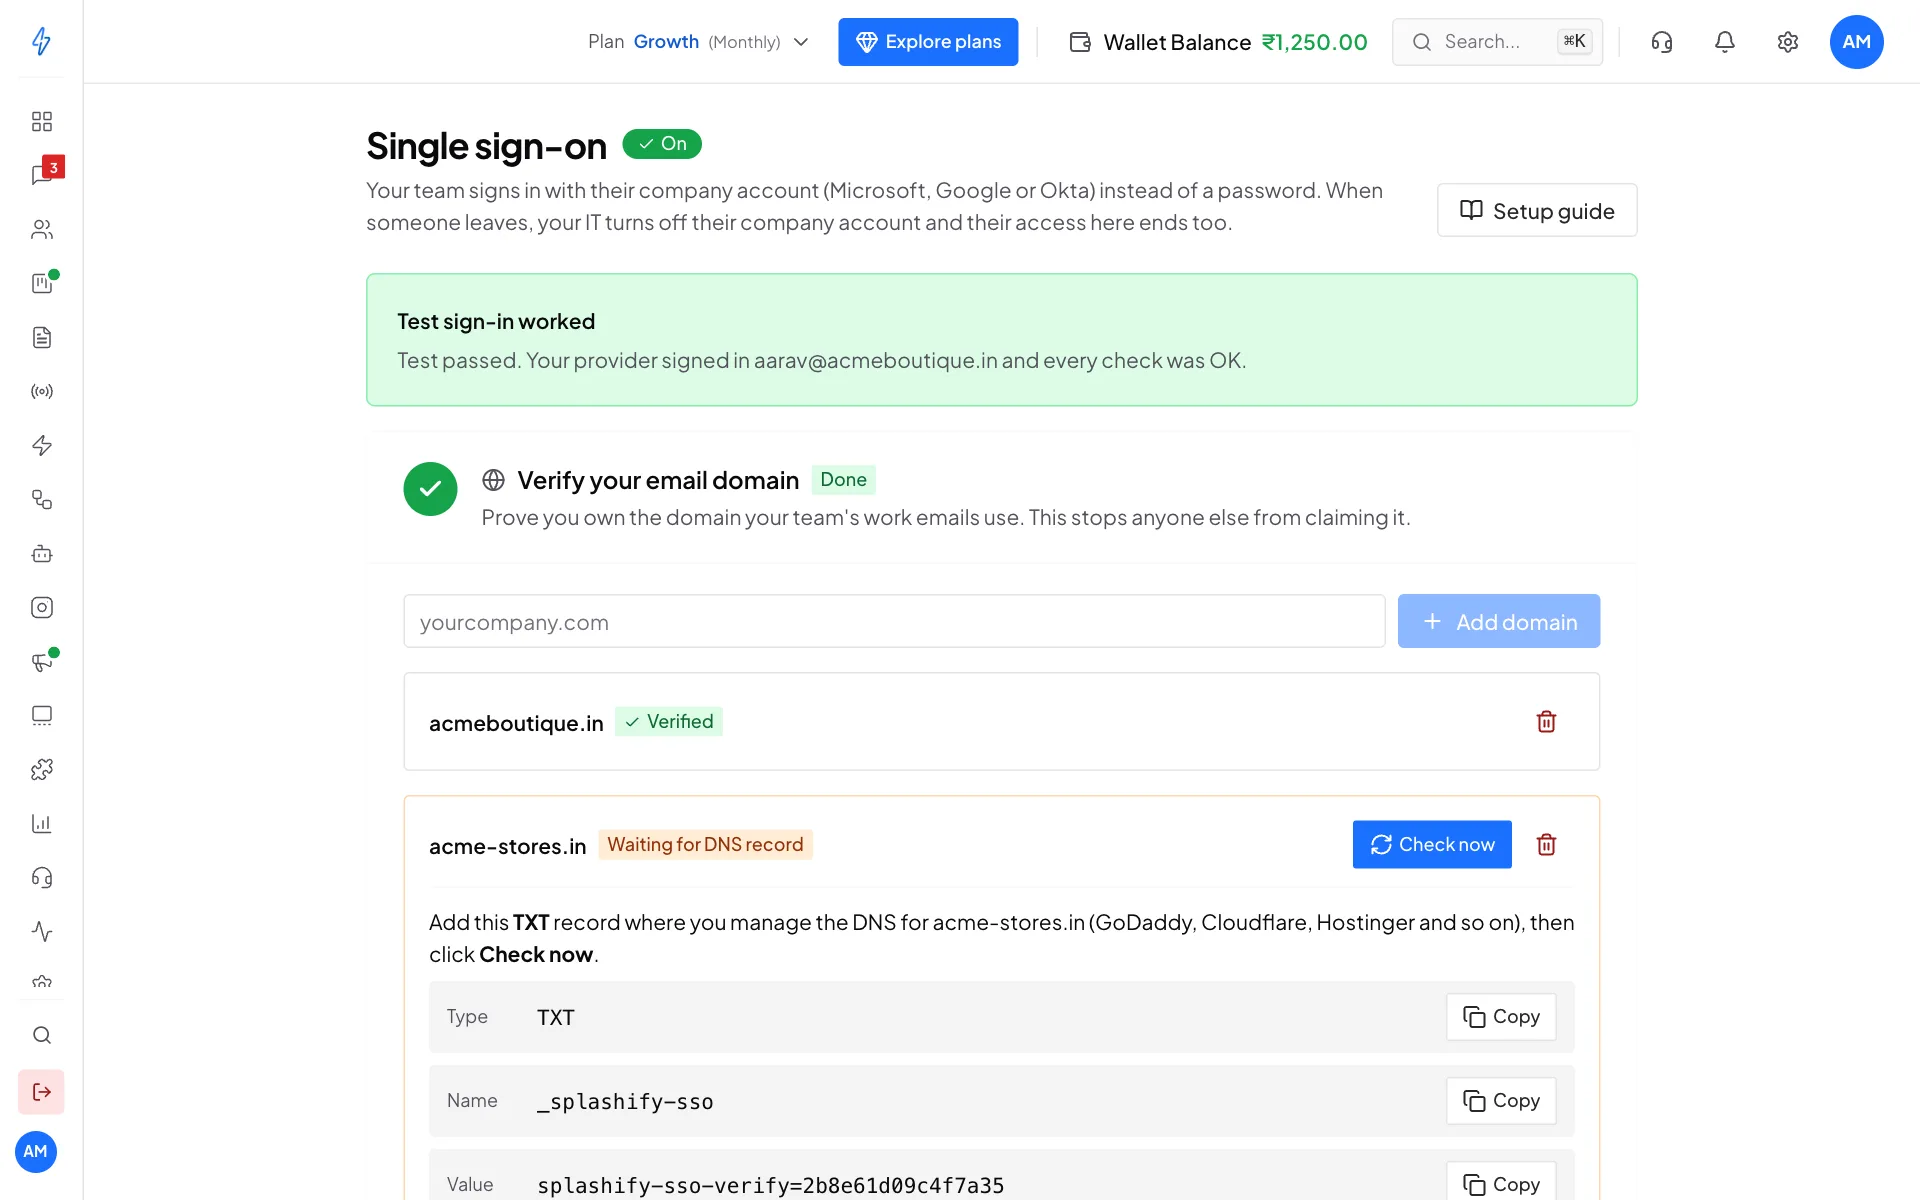
If you see Test sign-in failed, the banner says why. Fix that setting in your provider or in step 2, then test again.
Step 3: Turn it on
Turn on Single sign-on
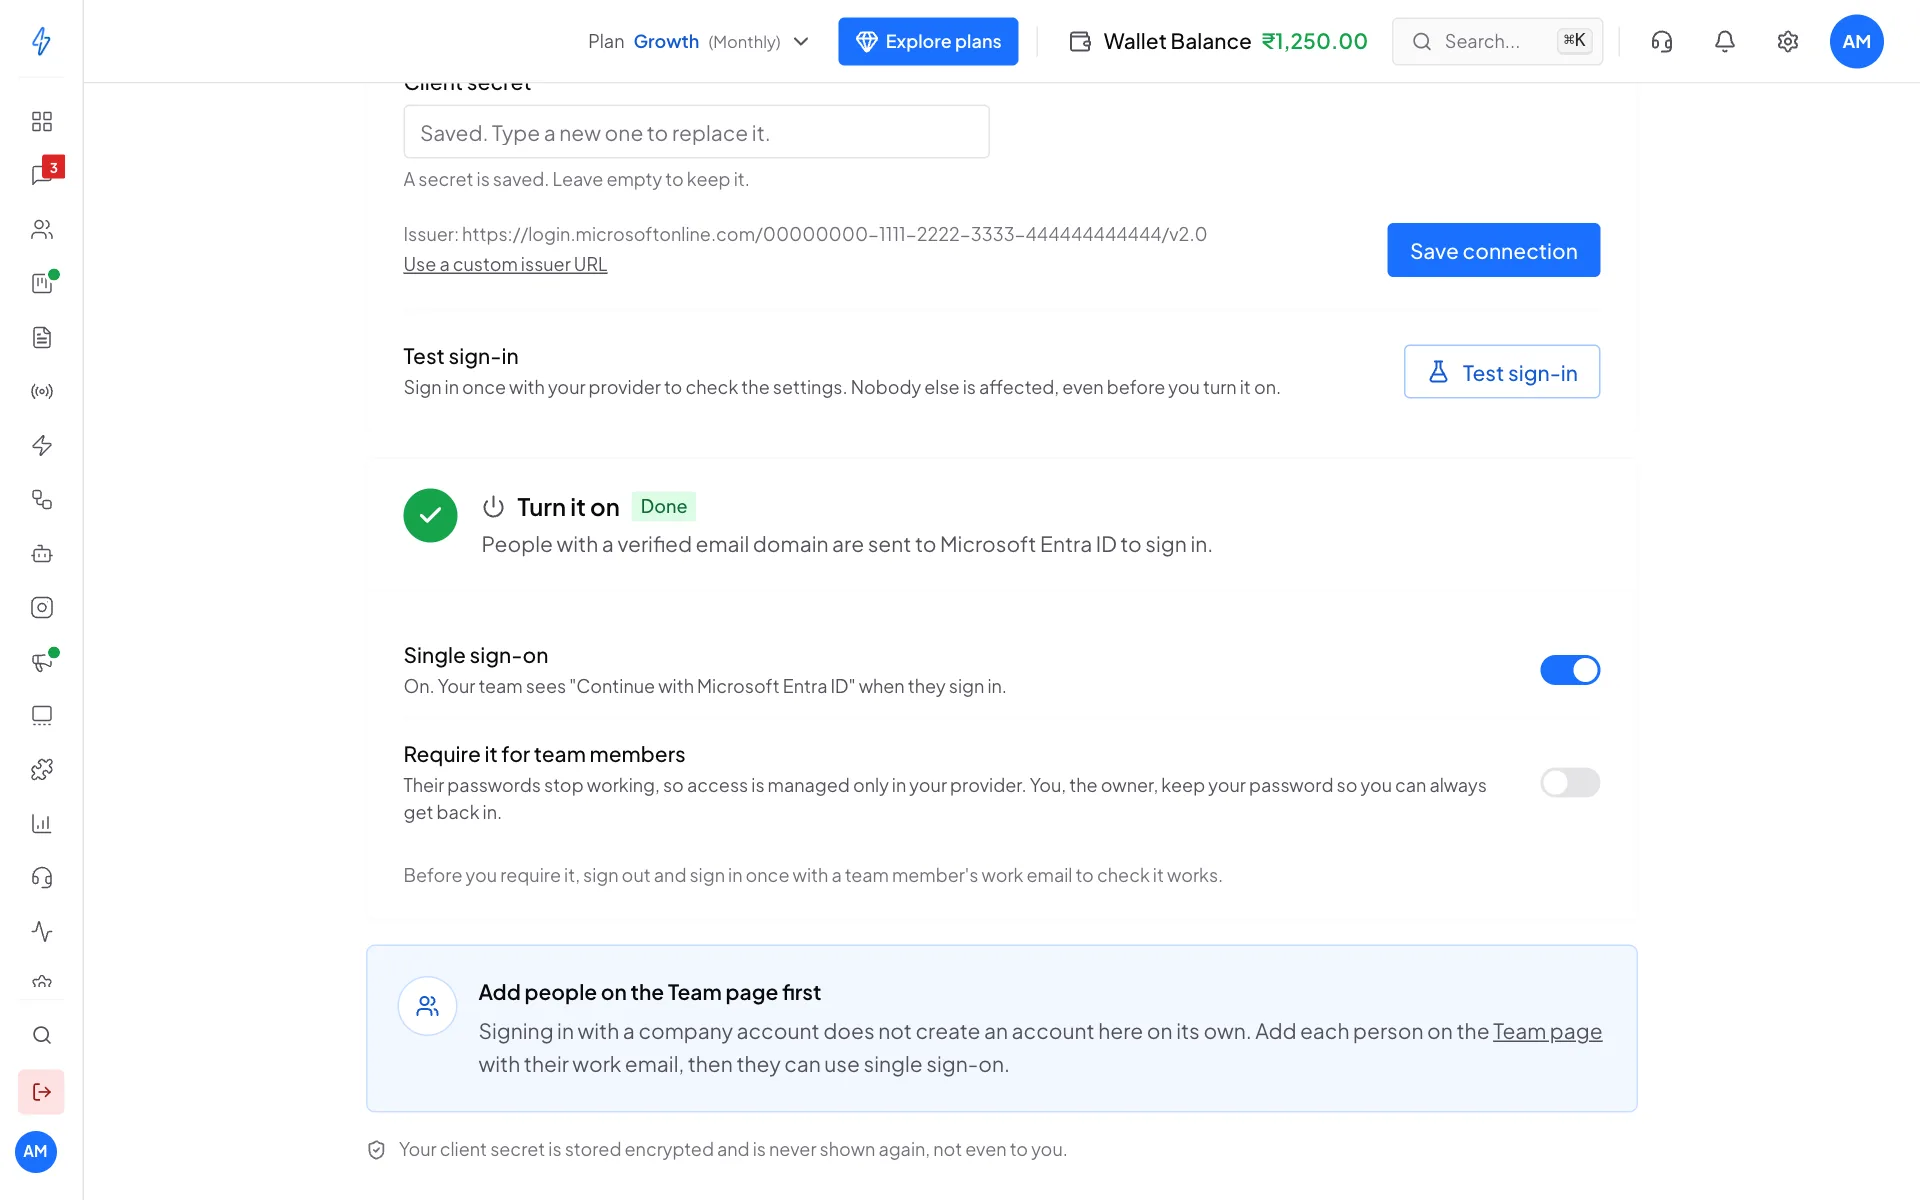
Under Turn it on, switch on Single sign-on. From now on, anyone with a verified email domain is sent to your provider to sign in. The badge at the top shows On.
Switch it on, then decide if it is required Require it for team members (optional)
Switch on Require it for team members if you want everyone on your team to use their work account. Their passwords stop working, so access is managed only in your provider. You, the owner, keep your password, so you can always get back in. Click Require it to confirm.
Sign in once as a team member first
Before you require it, sign out and sign in once with a team member's work email. Make sure it works. Otherwise your team could be locked out until you switch it off again.
To stop using single sign-on, switch off Single sign-on. Everyone signs in with their password again.
Add people on the Team page first
Signing in with a work account does not create an account here. Add each person on the Team members page with their work email first. Then they can use single sign-on.
How your team signs in
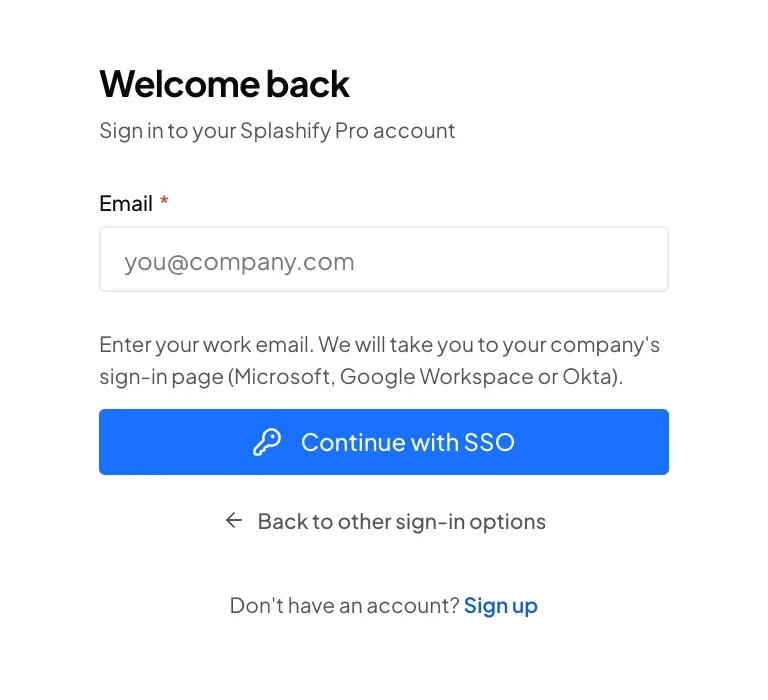
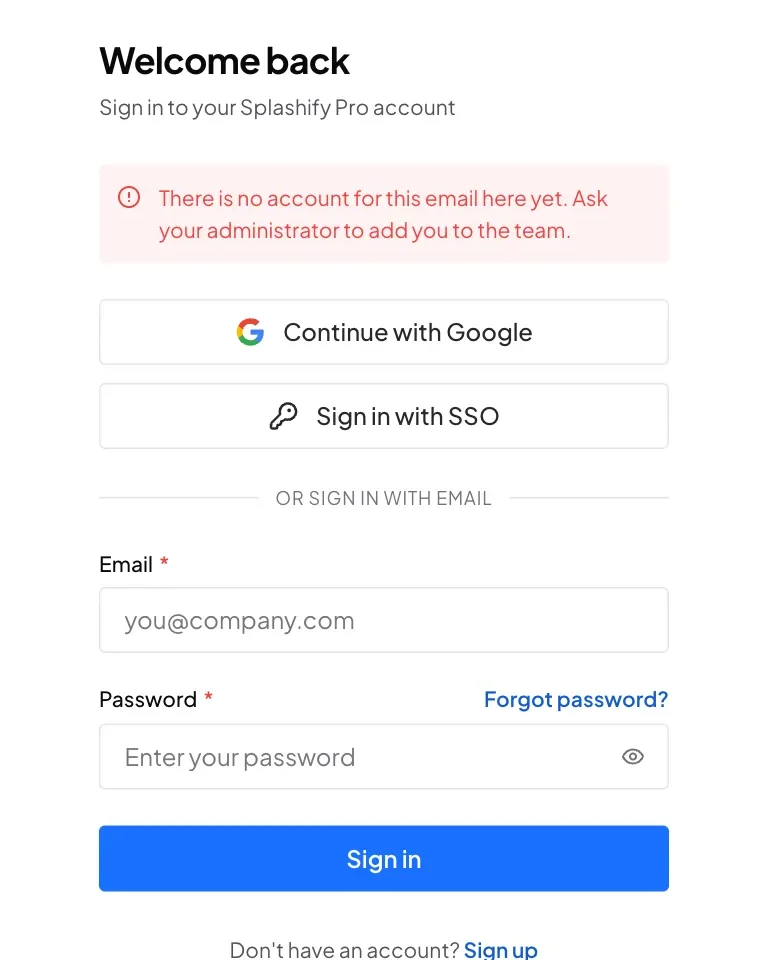
On the sign-in page, click Sign in with SSO.
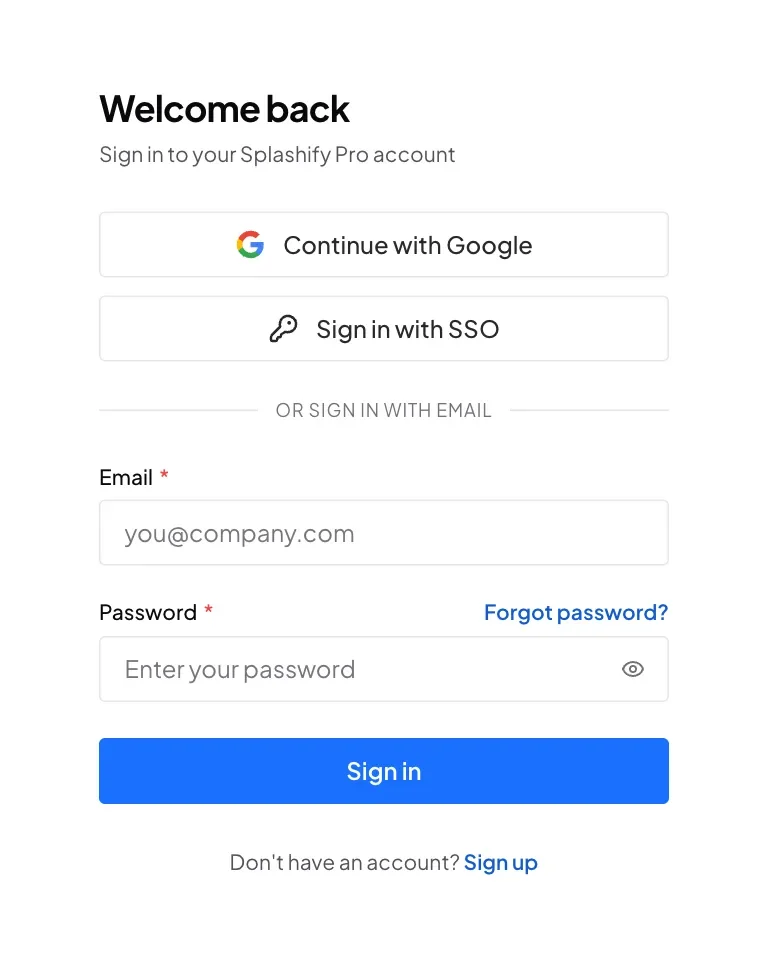
Enter your work email, for example [email protected], and click Continue with SSO. You go to your company's sign-in page. After you sign in there, you come straight back, signed in.
You can also just type your work email in the normal Email box. The page notices your company uses single sign-on and shows Continue with Microsoft (or Google, or Okta) in place of the password box. Click it.
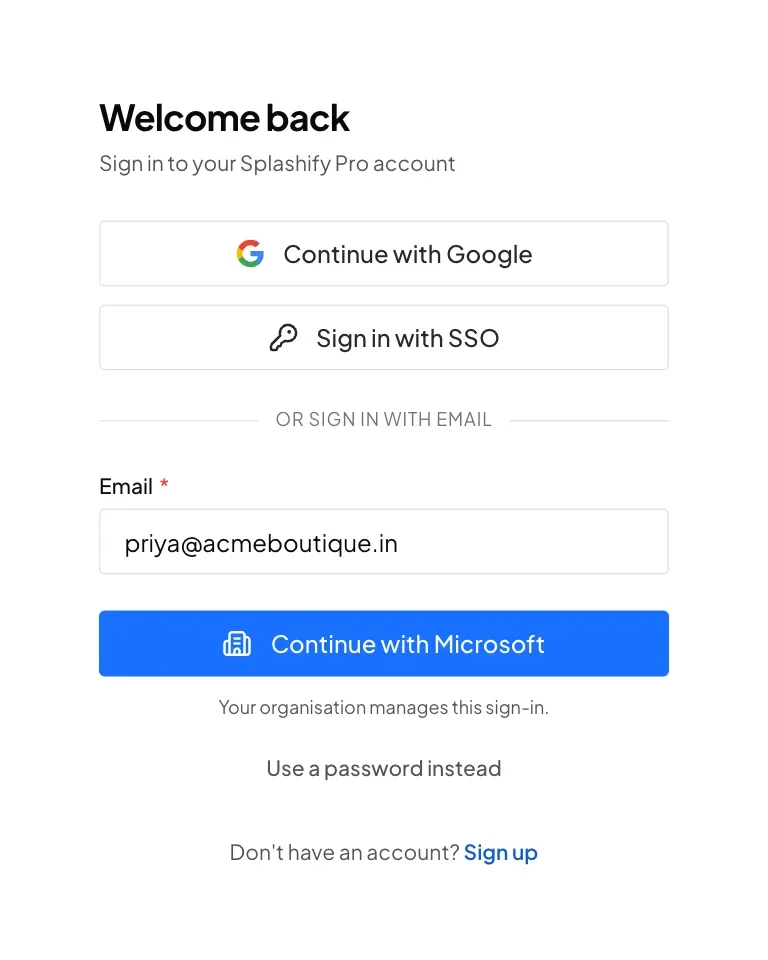
Use a password instead shows the password box again. It works only if single sign-on is not required for you.
If sign-in does not work
If something goes wrong, the sign-in page shows a message in red at the top.
The owner can always get in
The owner's password keeps working, even when single sign-on is required. If your provider has a problem, the owner can sign in with their password and switch single sign-on off.