
AI agent actions
Actions let your Chat AI agent do more than talk. While it chats with a customer, it can look up an order in your own system, tag the contact, save the details they share, or open a deal in your Sales Pipeline. It then answers with what it found.
How it works
- A customer asks something, for example "Where is my order AB-10234?"
- The agent reads the when to use text of each action and picks the right one. If it needs a detail, like the order number, it asks for it first.
- It calls your system. Your system has 10 seconds to answer.
- It replies in the chat, using only what your system sent back. If the call fails, it says sorry and offers to connect a person. It never makes up an answer.
Open Actions
In the left sidebar, click AI Agents & Bots, open your Chat AI agent, then click the Actions tab.
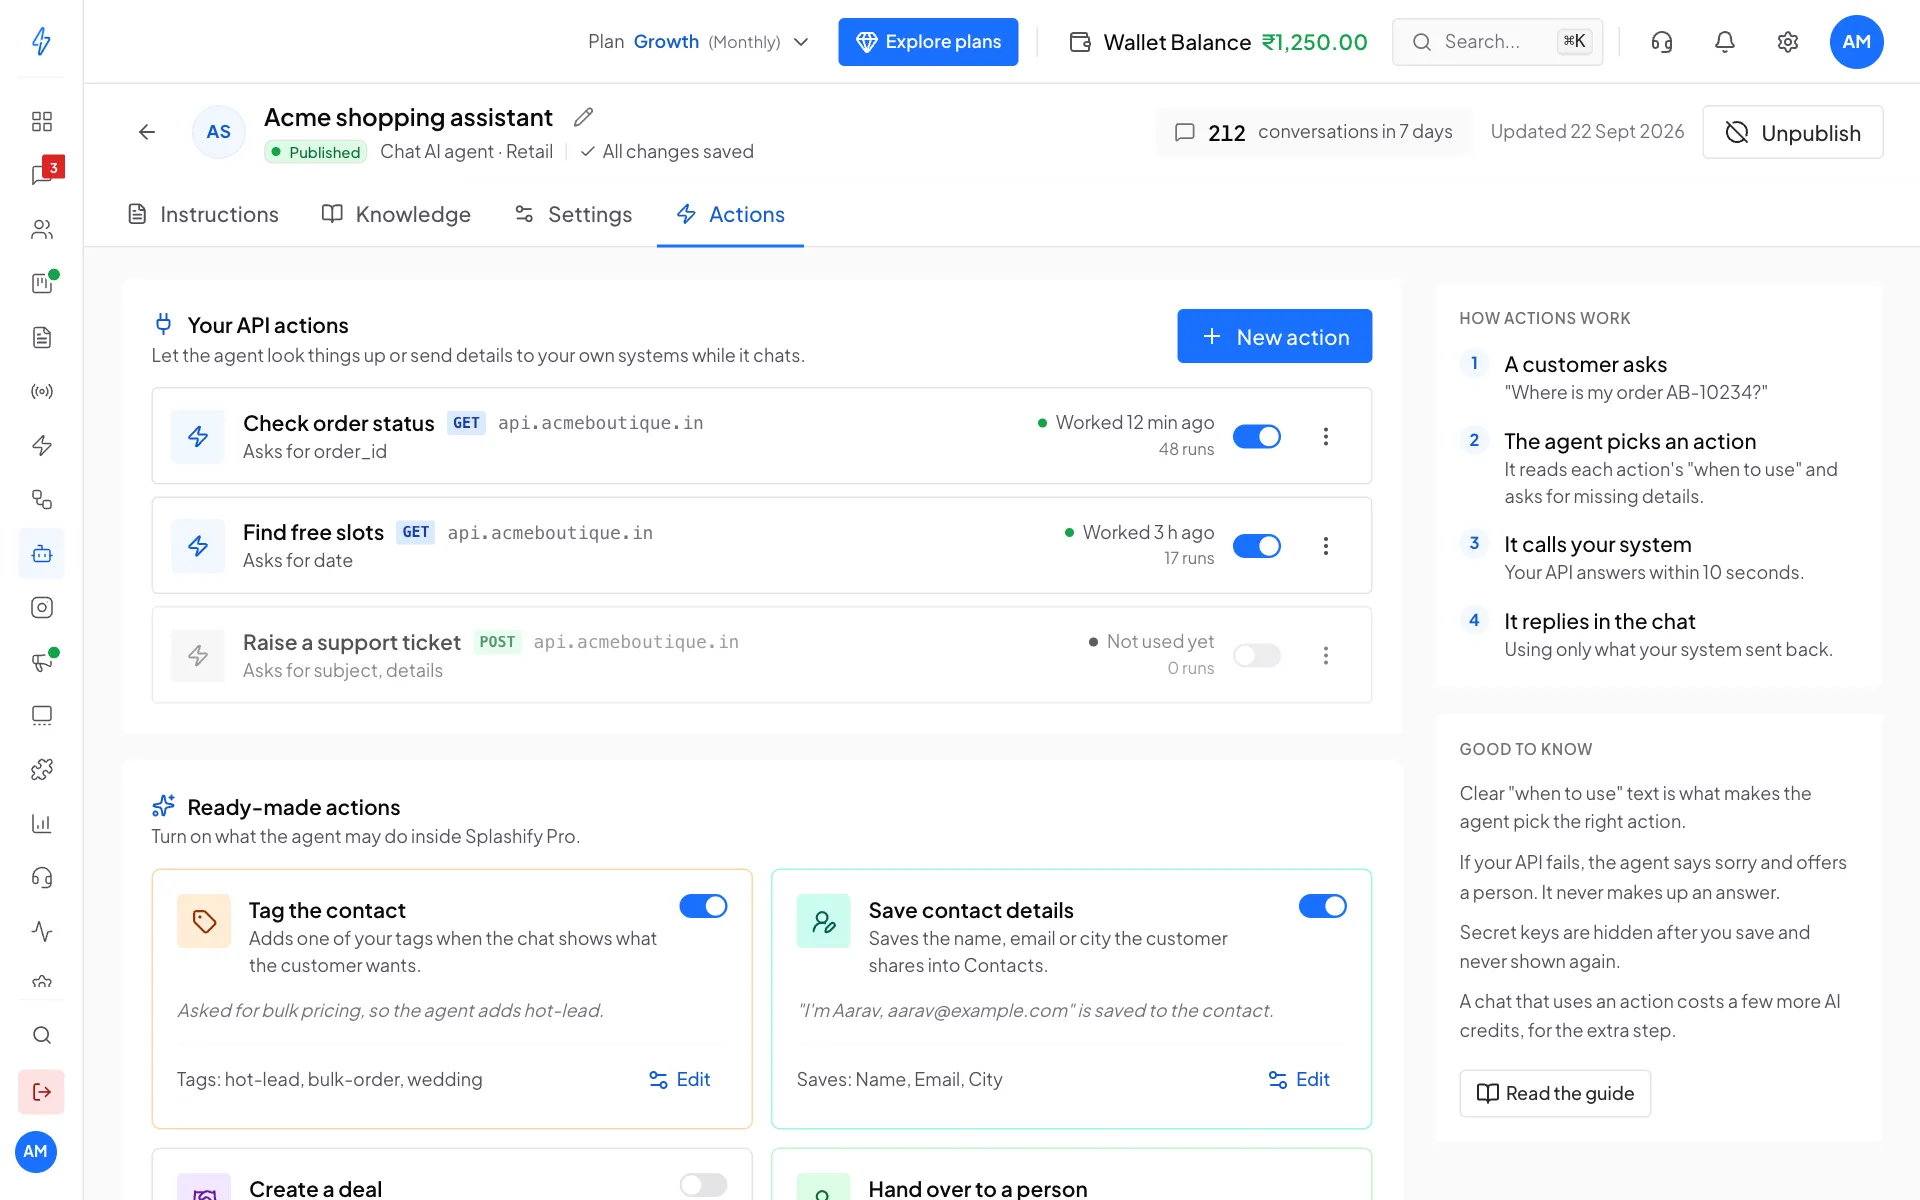
The tab has three parts:
- Your API actions: calls to your own systems, like an order lookup.
- Ready-made actions: things the agent can do inside Splashify Pro. Turn each on with its switch.
- Recent activity: every action the agent used, with what it sent and whether it worked.
Ready-made actions
These need no setup outside Splashify Pro. Click Set up (or Edit) on a card, choose the options, then click Save and turn on.
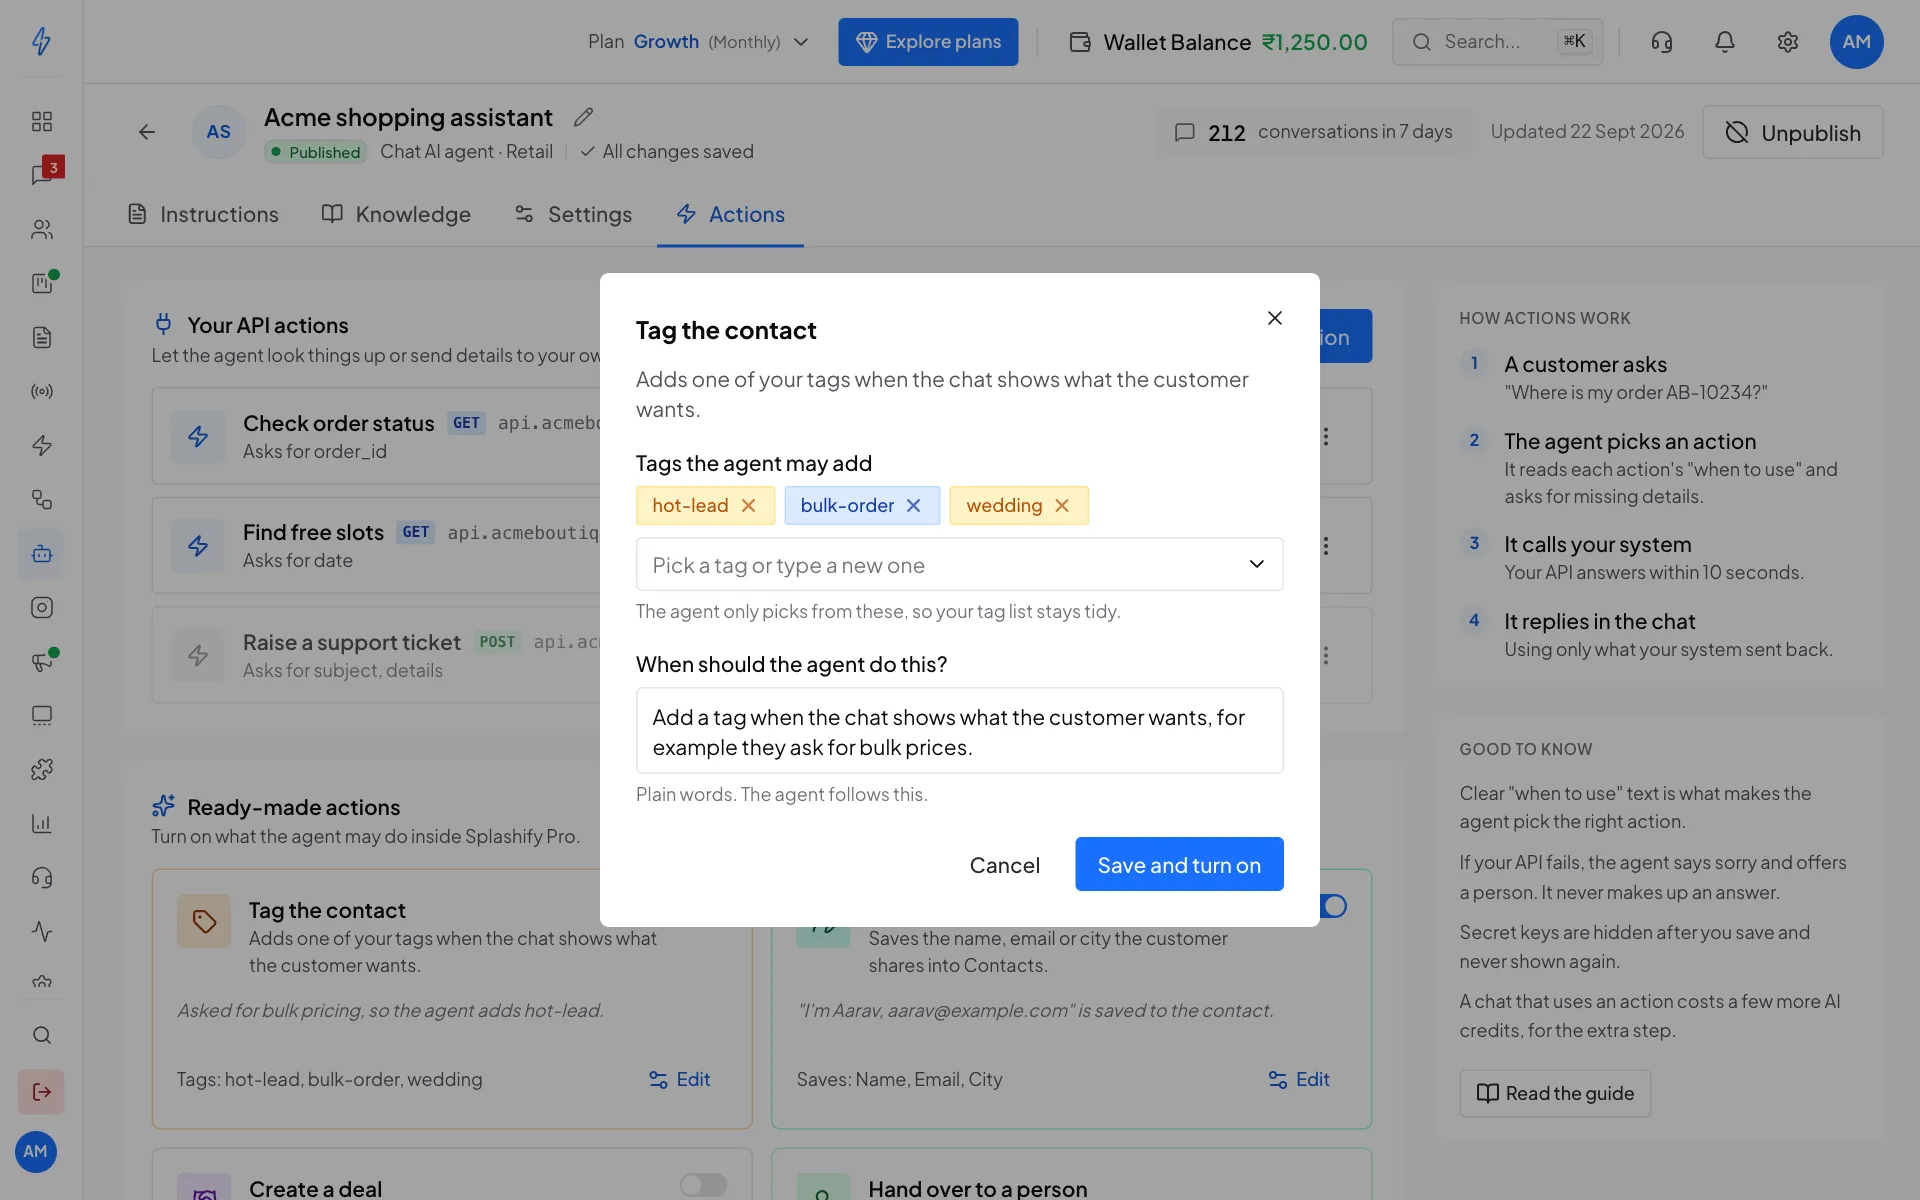
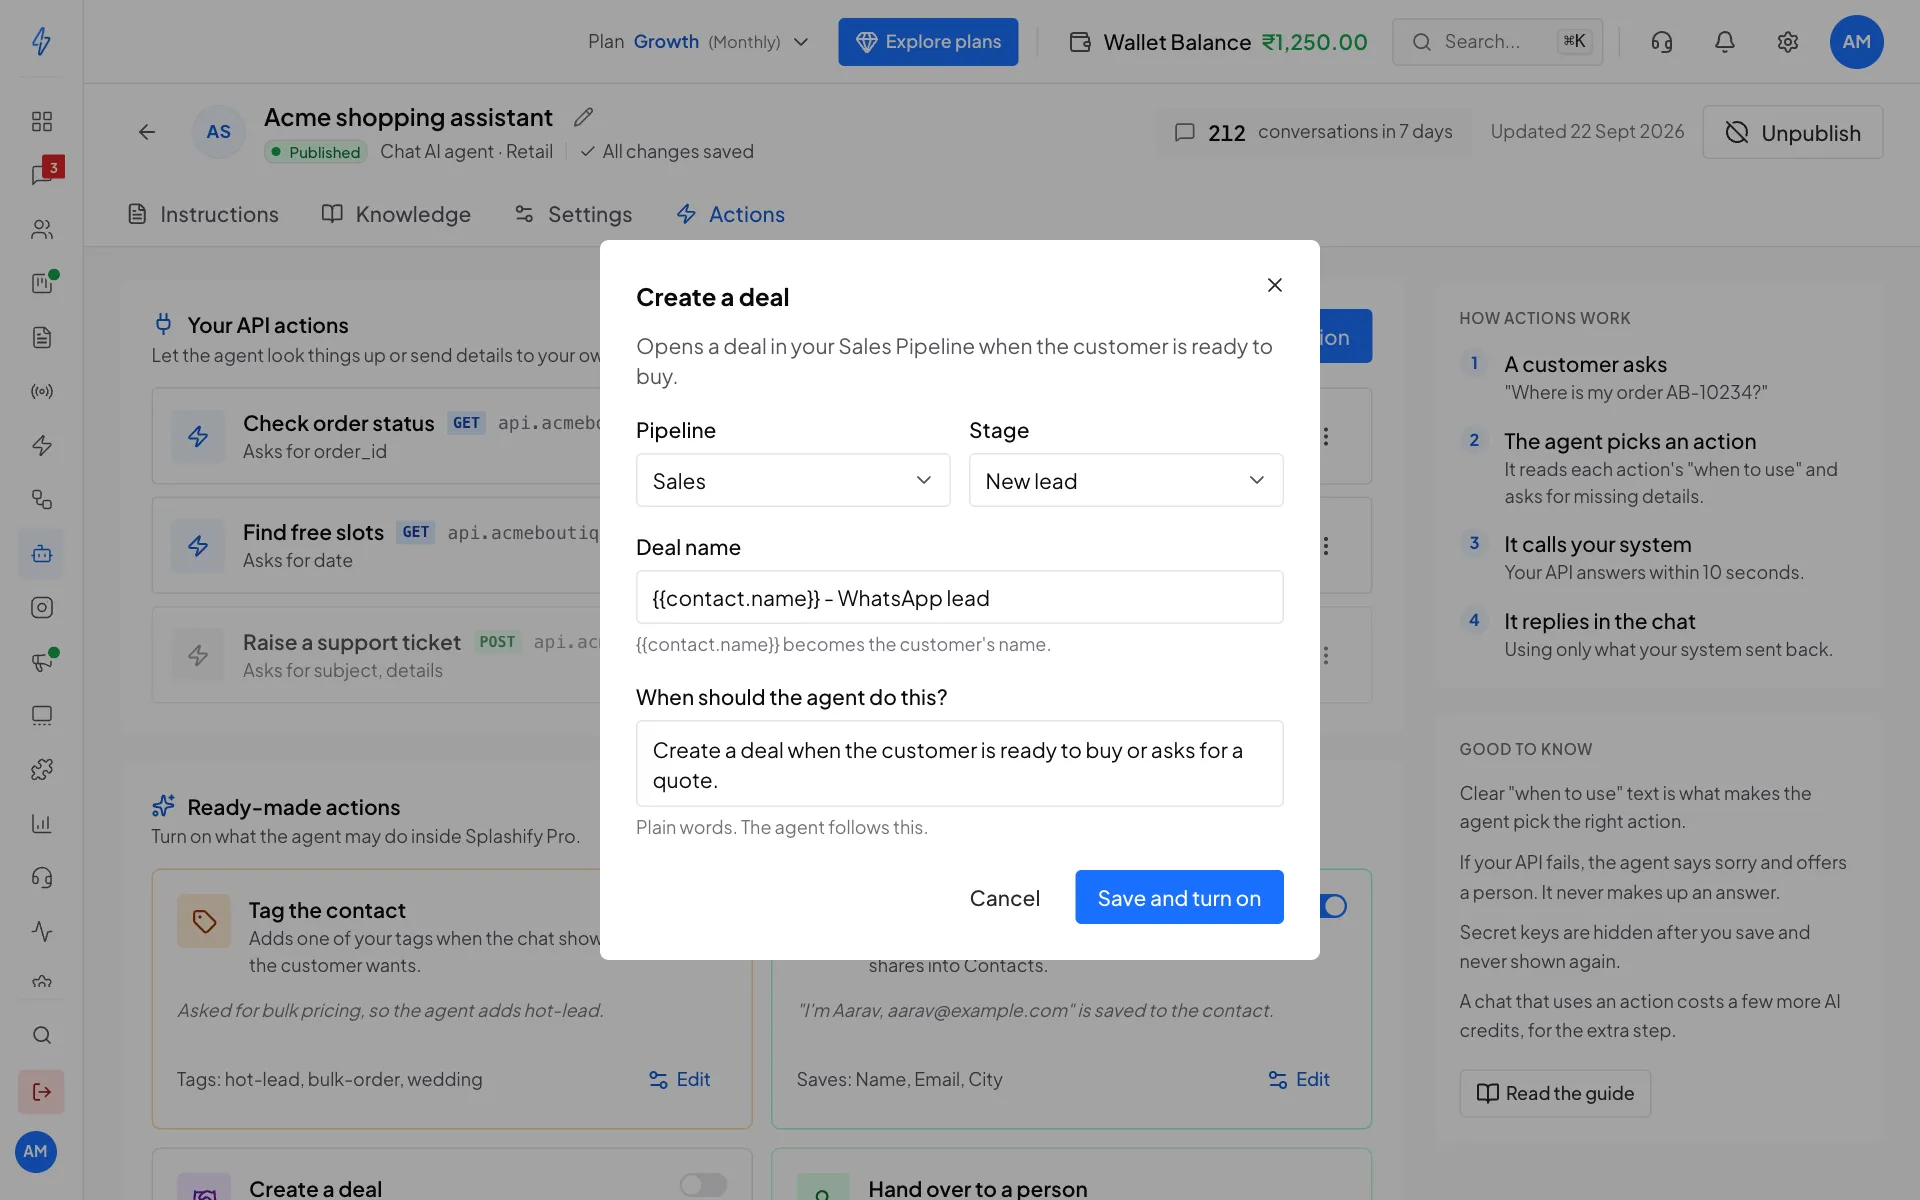
Each window also has When should the agent do this?. Write it in plain words, for example Create a deal when the customer asks for a quote. The agent follows it.
Create a deal needs a pipeline
If you have no pipeline yet, open Sales Pipeline in the sidebar once. It creates a Sales pipeline for you.
Add an API action
Use an API action when the answer lives in your own system: order status, bookings, stock, loyalty points, or a lead in your CRM.
Start a new action
Click New action. Pick a starting point: Check order status, Find free slots, Send a lead to your CRM, Raise a support ticket, or Start from scratch. A starting point fills in an example you then change.
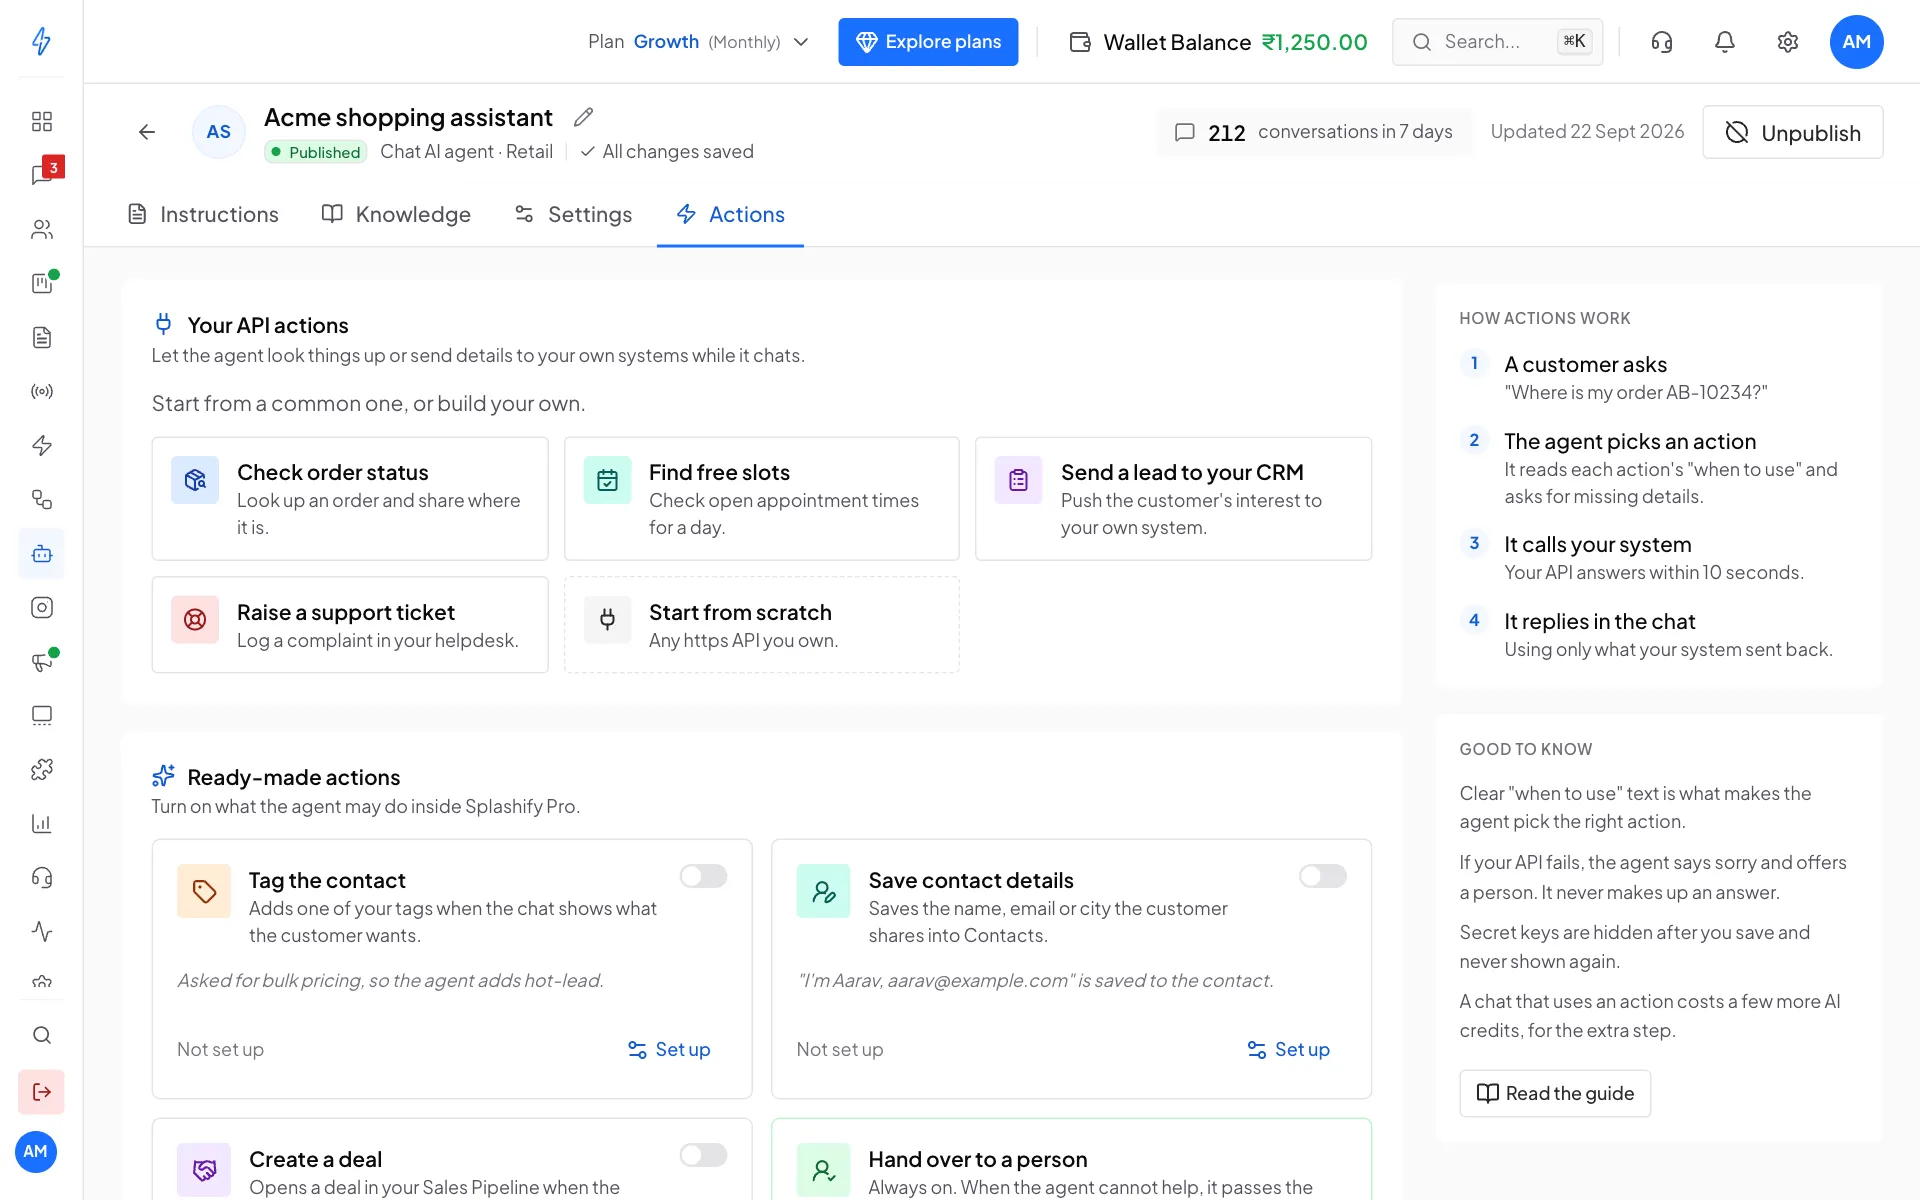
Start from a common action or from scratch Say what it does
Under What it does, type a Name people will recognise, like Check order status. Then fill in When should the agent use it?. Say what the action returns and when to use it:
Looks up an order by its number and returns the status and delivery date. Use it when a customer asks where their order is.
This text matters more than anything else. It is how the agent decides which action to use.
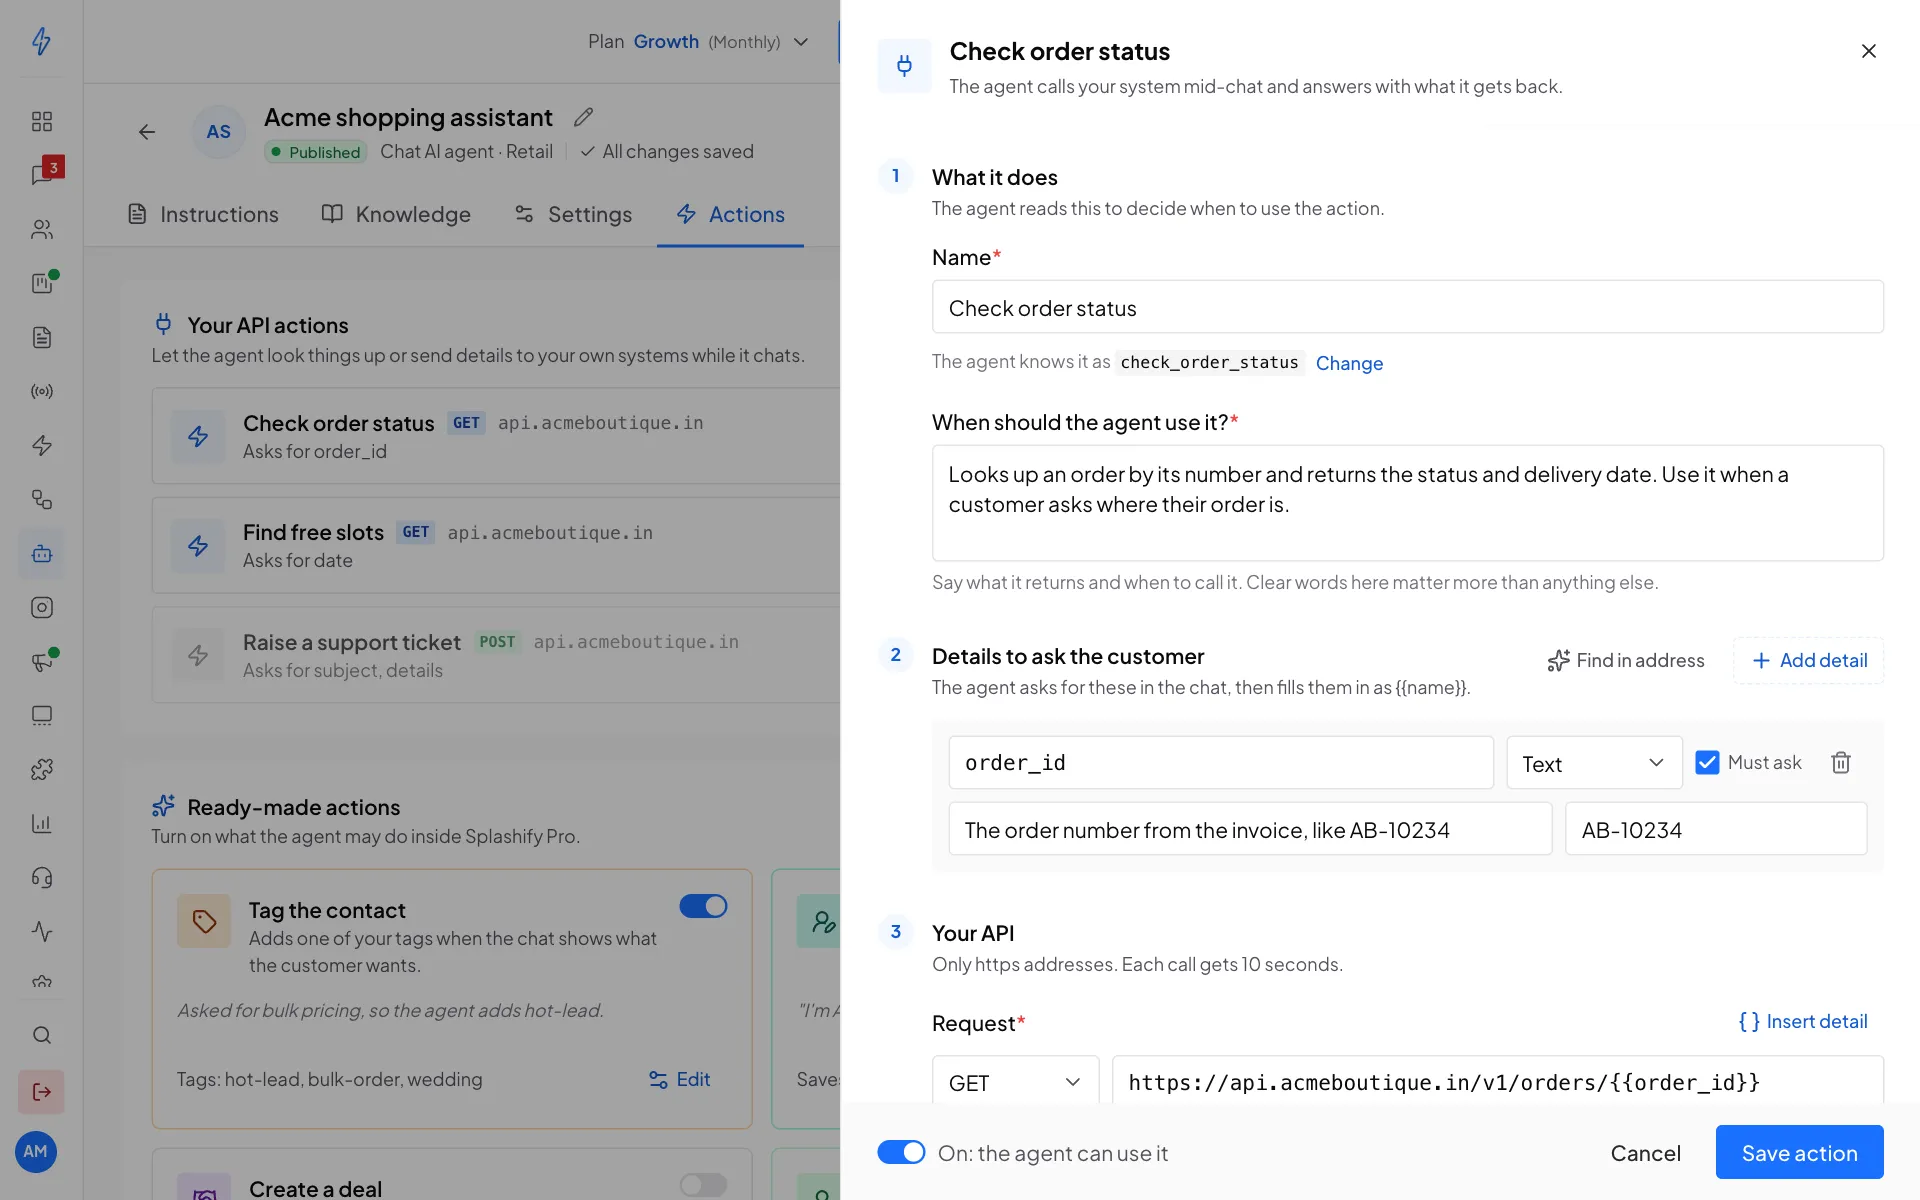
Steps 1 and 2: what it does and what to ask the customer Add the details to ask for
Under Details to ask the customer, click Add detail for each thing your system needs, like order_id. For each one, add a short description (the order number from the invoice) and an example (AB-10234). Tick Must ask if the action cannot work without it. The agent asks the customer for these in the chat.
Add your API
Under Your API, pick the method (GET to read, POST to send) and paste the address. It must start with https://. Put a detail inside the address with double braces, for example:
https://api.acmeboutique.in/v1/orders/{{order_id}}Click Insert detail to add one without typing. If your API needs a key, click Add header, type the header name (for example Authorization) and paste the key. Click the lock to mark it secret. A secret is hidden after you save and is never shown again.
For POST, PUT and PATCH, a Body (JSON) box appears. Put details in quotes, like
"{{order_id}}", and click Tidy to format it.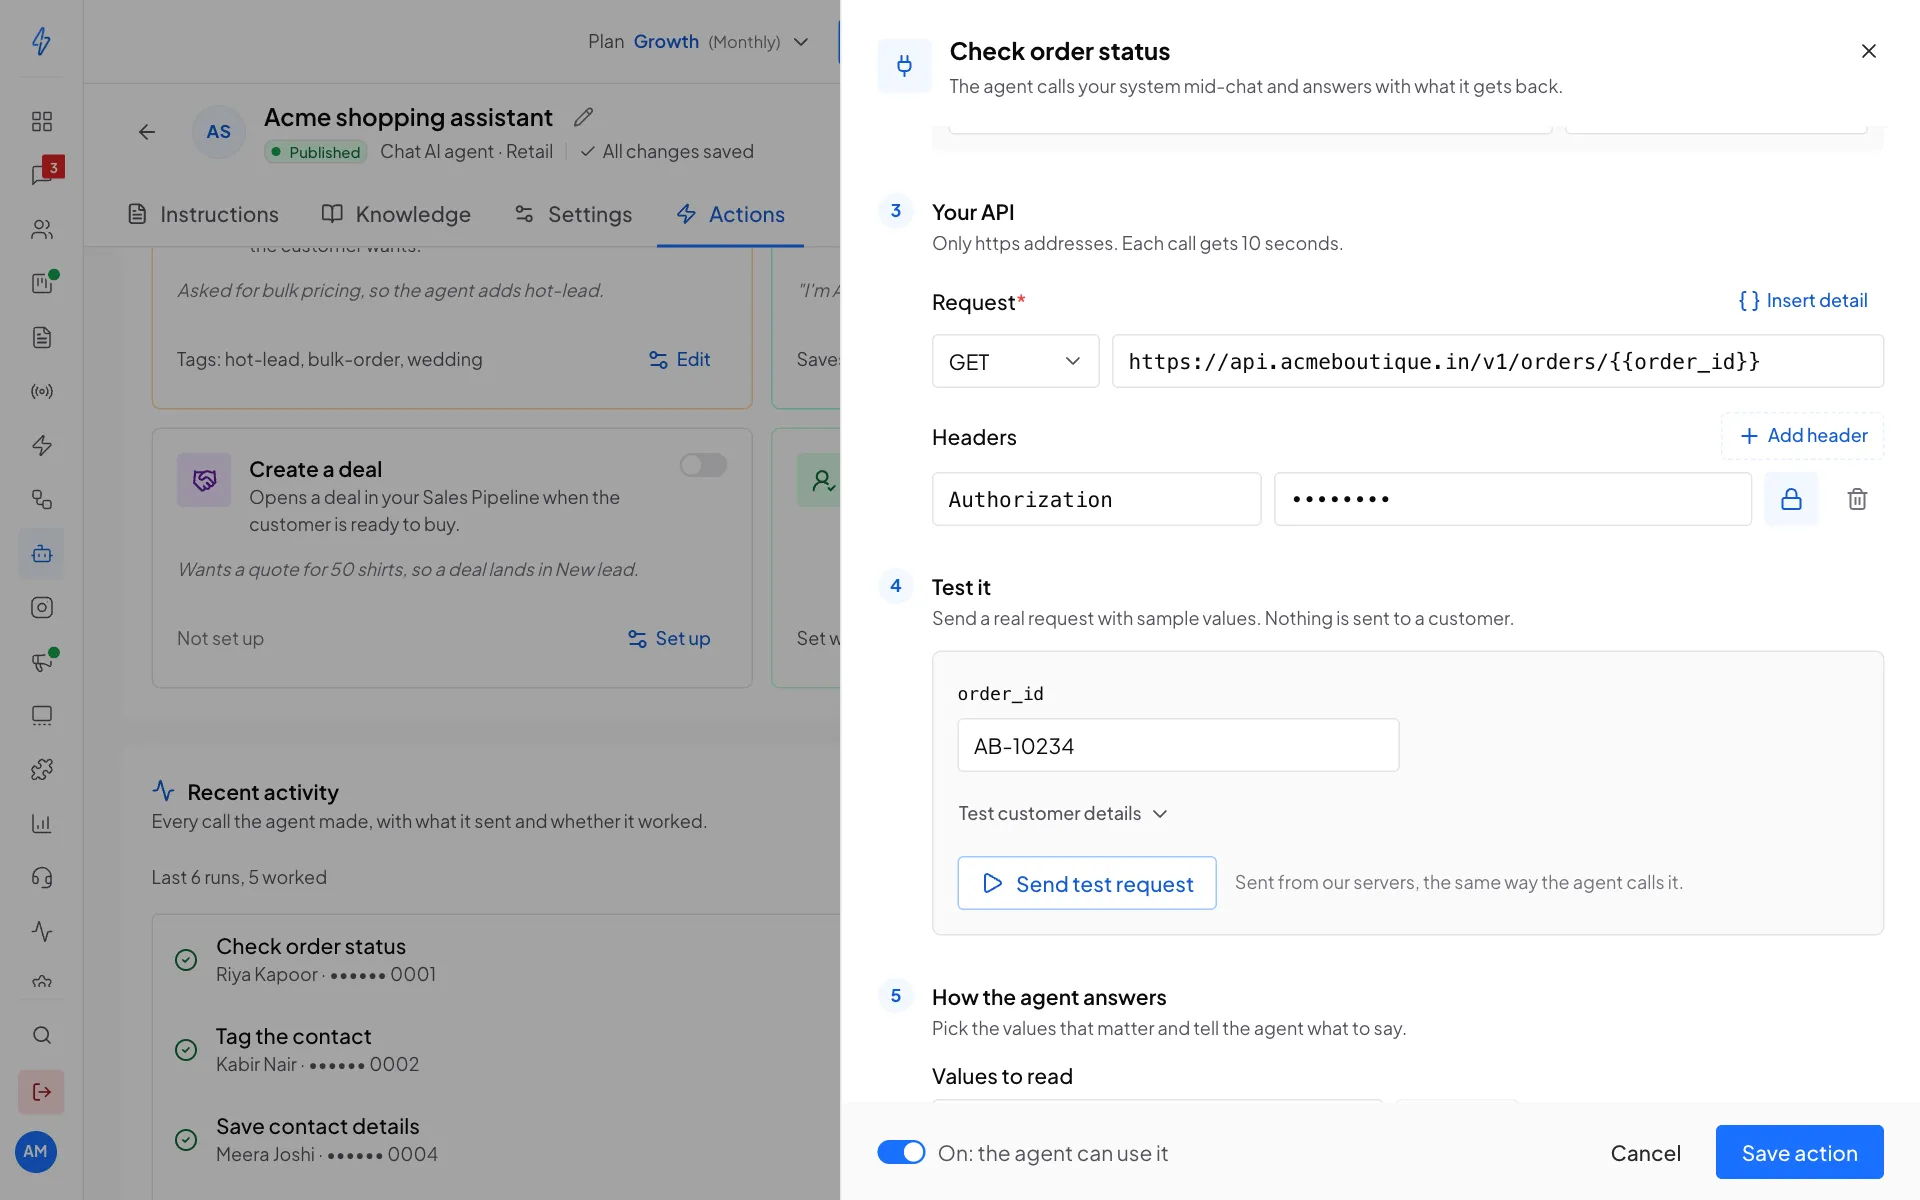
Step 3: your API address and headers Test it
Under Test it, type a sample value for each detail and click Send test request. The test works the same way the agent will call your API. Nothing is sent to a customer.
Green means it worked. The result has three views:
- What the agent reads: exactly what the agent gets back.
- Full response: everything your API sent.
- Request sent: the address and body we called, with secrets hidden.
Below, click the values the agent needs, like status and expected_delivery. Fewer values make replies faster, cheaper and more accurate. If you pick none, the agent reads the whole response (up to 3,000 characters).
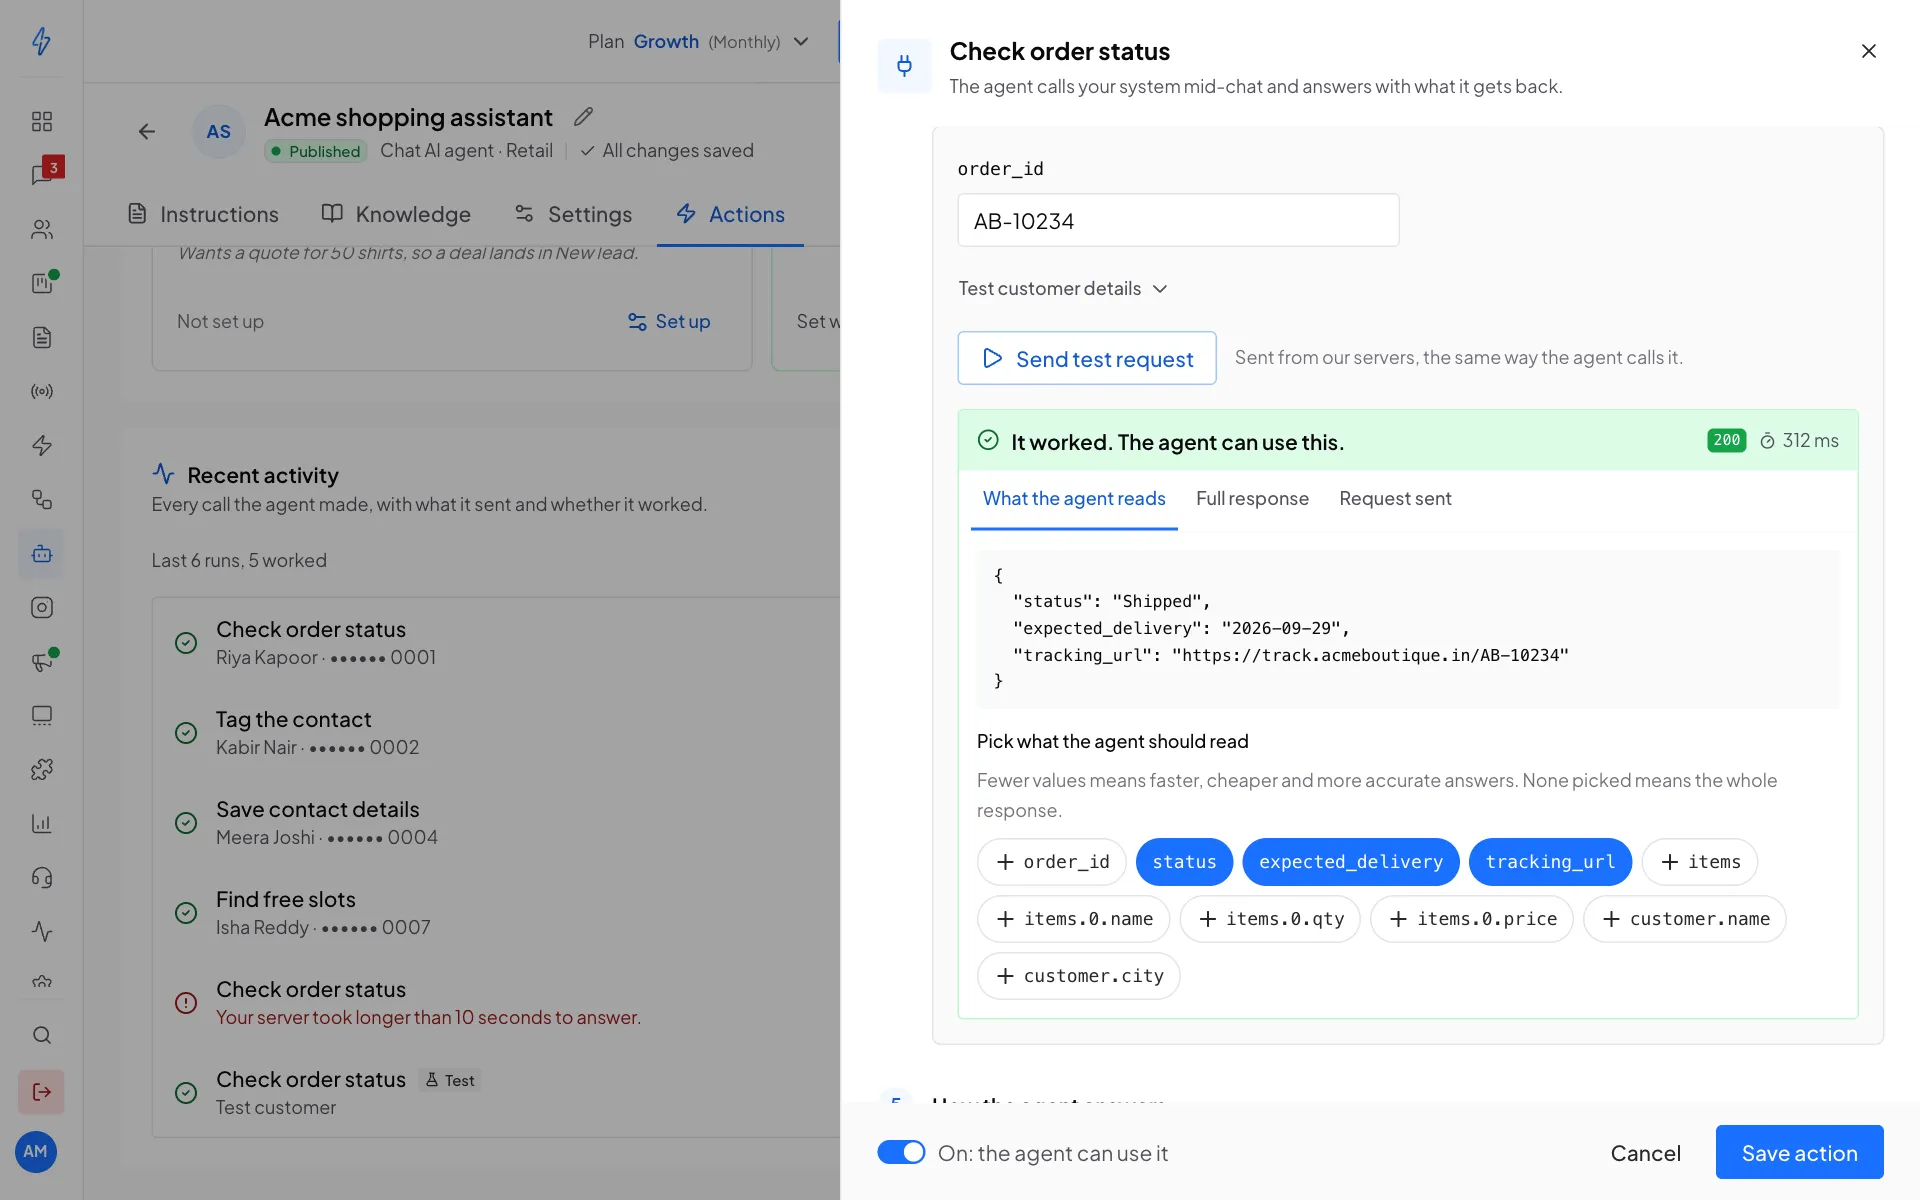
Step 4: test it and pick what the agent reads Tell it how to answer, then save
Under How the agent answers, check the Values to read and add Reply guidance if you like, for example Share the delivery date and the tracking link. Leave the switch at the bottom On and click Add action.
The action shows in Your API actions with its method, address, the details it asks for, and when it last worked. Use its switch to pause it, or click ⋮ to Edit and test, Duplicate or Delete it.
Actions run once the agent is published
Tests work any time. In real chats, the agent uses its actions after you click Publish.
Check what the agent did
Recent activity lists the last 50 times an action ran, newest first. Each row shows the action, the customer (phone number hidden except the last 4 digits), how long it took, and when. A green tick means it worked; a red mark shows the reason it failed. Click a row to see the details the agent sent and to open the chat.
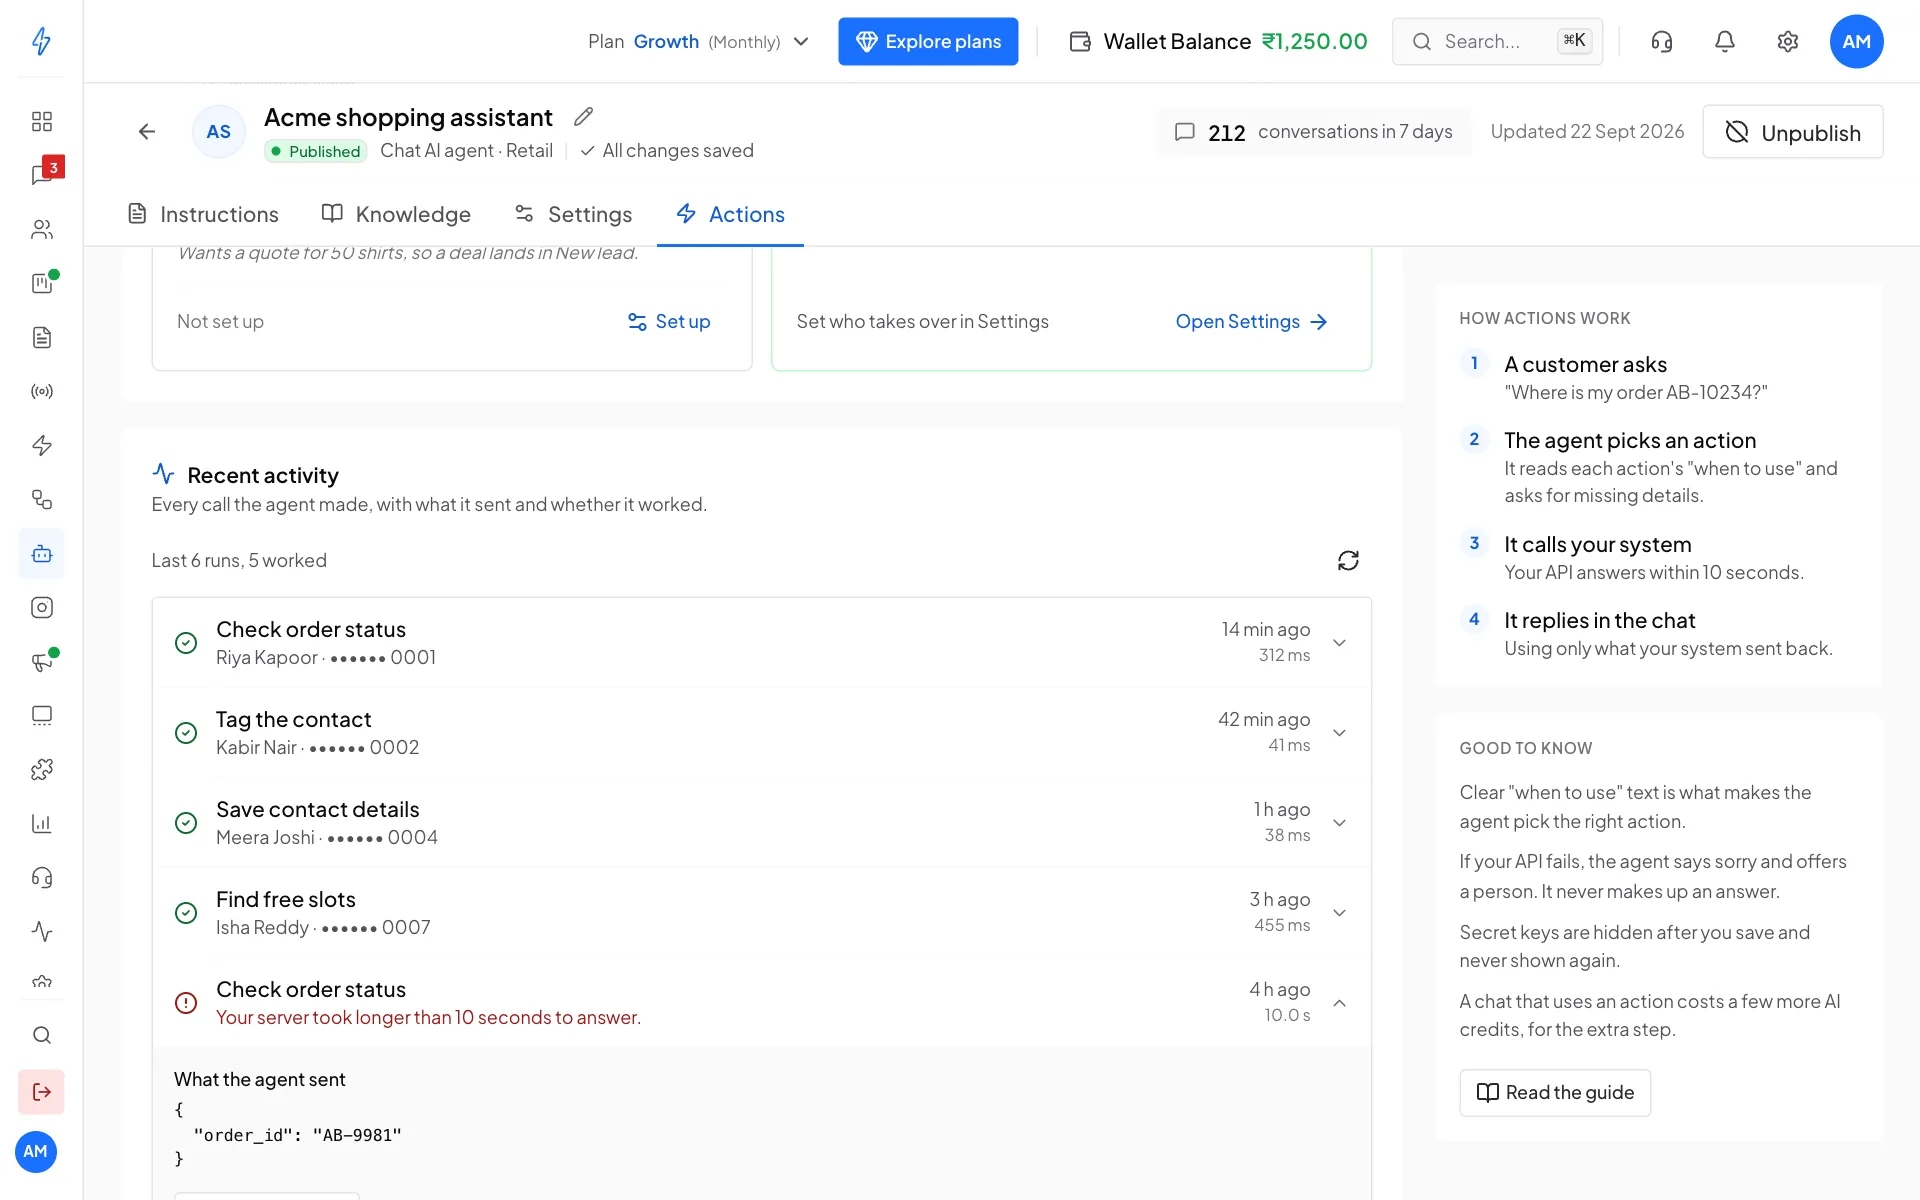
Tests show with a Test label.
Good to know
- Your API must use https, be reachable from the internet, and answer within 10 seconds.
- In one reply, the agent can use actions up to 5 times.
- A chat that uses an action costs a few more AI credits, because the agent reads your system's answer before it replies. See AI credits and pricing.
- Each agent can have up to 20 actions.
- Customer details you can use anywhere in the address, headers or body:
{{contact.name}},{{contact.phone}},{{contact.email}}and{{conversation.id}}.