
Connect your AI assistant
Every assistant needs the same two things: the link below, and one sign-in where you click Allow. Pick your assistant, follow its steps, then see What you will see.
https://mcp.splashifypro.com/mcpBefore you start
- Sign in as the account owner. Team members can not connect an AI assistant.
- Your plan must include API access. If it does not, the Splashify Pro page tells you and links to the plans.
- You do not need an API key or a Client ID. If an app asks for one, leave it empty.
- The menu names below are the ones each app used when we wrote this page. Apps rename their menus often. If a name is different, look for Connectors, Apps, Tools or MCP in the app's settings.
Claude (web, desktop and mobile)
Open Connectors
In Claude on the web, in the desktop app or in the mobile app, open Customize, then Connectors.
Add a custom connector
Click + Add, then Add custom connector. Type the name
Splashify Pro, paste the linkhttps://mcp.splashifypro.com/mcpas the server URL and click Continue.Keep the sign-in settings Claude found
Claude reads our sign-in settings by itself. Keep what it chose, click Continue, then Add. If signing in fails later, edit the connector and pick Register automatically for the OAuth client.
Sign in and allow
Claude opens the Splashify Pro page, now or the first time it needs Splashify Pro. Sign in as the account owner, check the page and click Allow. See What you will see.
Use it in a chat
In a chat, click +, then Connectors, and turn on Splashify Pro. Then ask, for example, "Show my unread WhatsApp chats from today".
On the Free plan you can add one custom connector.
Team and Enterprise plans: an owner of your Claude organization adds the connector first, in Organization settings > Connectors: Add, then Custom, then Web, with the same name and link. Then each person opens Customize > Connectors, finds Splashify Pro and clicks Connect. Each person signs in with their own Splashify Pro account, so each connection works only in that person's account.
ChatGPT
Custom connections need developer mode, which is for paid ChatGPT plans on the web at chatgpt.com. In a work or school workspace, an admin may have to allow it first.
Turn on developer mode
Open Settings, then Security and login, and turn on Developer mode. In some accounts the switch is in Settings > Apps > Advanced settings instead.
Add Splashify Pro
Open Plugins and click +. In accounts with the older menu, click Create app in Settings > Apps > Advanced settings. Type the name
Splashify Proand pastehttps://mcp.splashifypro.com/mcpas the MCP server URL. If it asks for the authentication, choose OAuth. Create the connection.Sign in and allow
ChatGPT opens the Splashify Pro page, now or the first time it needs Splashify Pro. Sign in as the account owner, check the page and click Allow.
Use it in a chat
Start a new chat, click + and pick Splashify Pro from the tools menu. It can be under More or Developer mode.
Claude Code
Run this in your terminal:
claude mcp add --transport http splashify-pro https://mcp.splashifypro.com/mcpAdd --scope user before splashify-pro to use it in every project, not only the current one.
Then start Claude Code, type /mcp, choose splashify-pro and follow the sign-in steps. Your browser opens the Splashify Pro page: sign in and click Allow. If the browser does not open by itself, copy the link Claude Code shows and open it.
Cursor
Add Splashify Pro to ~/.cursor/mcp.json to use it in every project, or to .cursor/mcp.json in one project:
{
  "mcpServers": {
    "splashify-pro": {
      "url": "https://mcp.splashifypro.com/mcp"
    }
  }
}
If the file already lists other servers, add only the "splashify-pro" part inside the existing "mcpServers". Save the file, open Customize in Cursor's sidebar, find splashify-pro and sign in when Cursor asks. Use it from the chat in Agent mode.
VS Code
You need Copilot Chat in VS Code. Create .vscode/mcp.json in your project, or run MCP: Open User Configuration from the Command Palette to use it in every project:
{
  "servers": {
    "splashify-pro": {
      "type": "http",
      "url": "https://mcp.splashifypro.com/mcp"
    }
  }
}
Click Start above "splashify-pro" in the file, or run MCP: List Servers and start it there. VS Code asks you to trust the server and then to sign in: allow both, then sign in on the Splashify Pro page and click Allow. Open the Chat view and pick Agent. The Splashify Pro tools are listed under Configure Tools.
Gemini CLI
Run this in your terminal:
gemini mcp add --transport http --scope user splashify-pro https://mcp.splashifypro.com/mcpOr add it to ~/.gemini/settings.json yourself:
{
  "mcpServers": {
    "splashify-pro": {
      "httpUrl": "https://mcp.splashifypro.com/mcp"
    }
  }
}
Then start Gemini CLI and run:
/mcp auth splashify-proYour browser opens the Splashify Pro page: sign in and click Allow.
Devin Desktop (formerly Windsurf)
Add Splashify Pro to mcp_config.json. On macOS and Linux it is ~/.config/devin/mcp_config.json, on Windows %APPDATA%\devin\mcp_config.json. The older Windsurf editor uses ~/.codeium/windsurf/mcp_config.json.
{
  "mcpServers": {
    "splashify-pro": {
      "serverUrl": "https://mcp.splashifypro.com/mcp"
    }
  }
}
Save the file, refresh the servers from the MCP menu in the agent panel, and sign in when it asks.
Any other app
Add https://mcp.splashifypro.com/mcp as a remote MCP server that uses Streamable HTTP and sign-in with OAuth. No API key, Client ID or header is needed: the app finds our sign-in page by itself. Apps that only support the older SSE connection, or only API keys, can not connect.
An app we have not checked yet starts with read-only access. See Assistants we have not checked.
What you will see
Whichever assistant you use, it sends you to a Splashify Pro page at app.splashifypro.com. If you are not signed in, sign in first as the account owner. The page shows:
- where you go back to after you allow, in large text at the top, for example claude.ai;
- the assistant's name with an AI assistant badge, and at the top the assistant's own logo for ChatGPT, Claude, Cursor, Gemini and Windsurf (other assistants show an AI assistant icon);
- the Splashify Pro account it will connect to;
- that it has no daily limits to start, and that you can set them later in Settings > Connected apps;
- that the messages and broadcasts it sends are charged to your wallet at your normal rates;
- what it will be able to do, and what it will be able to see.
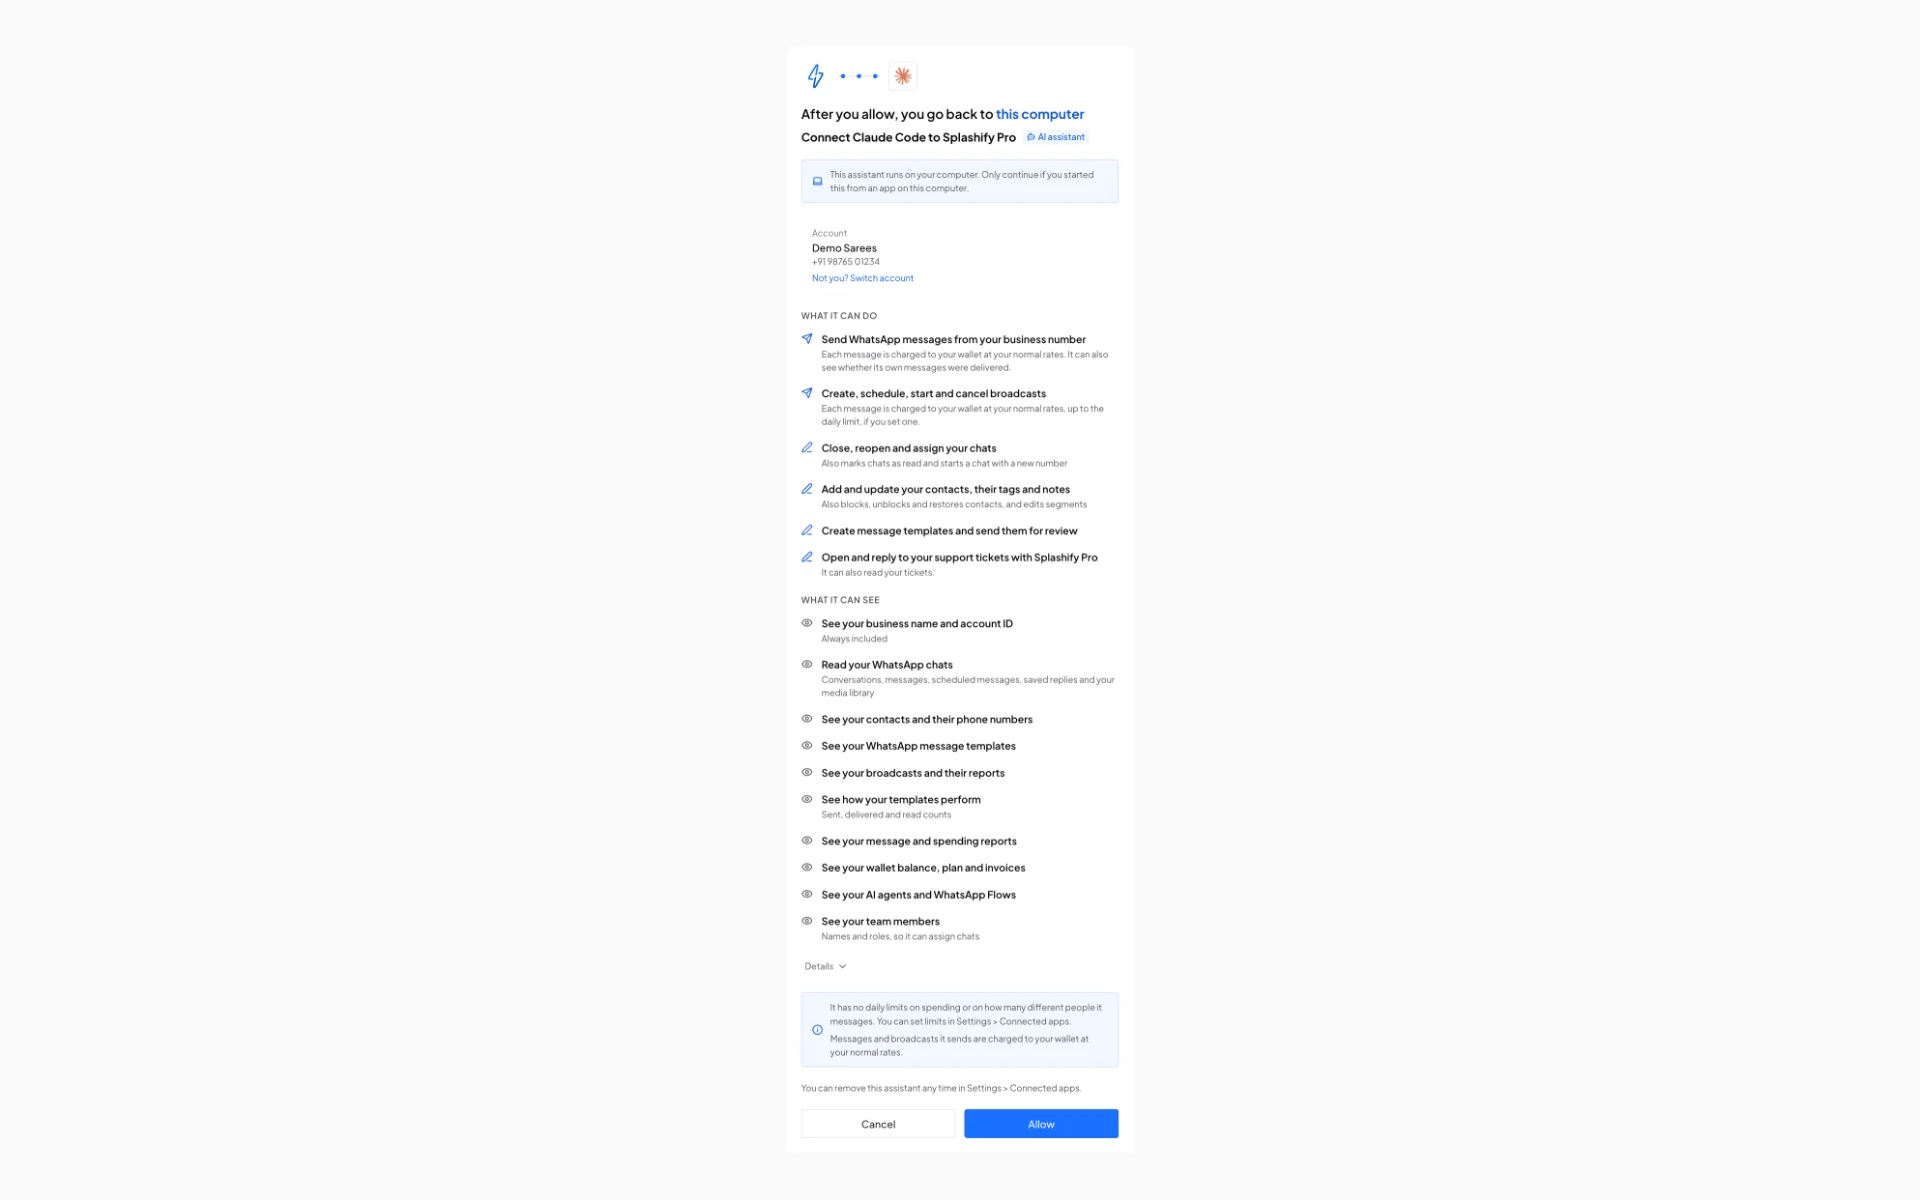
Check where you go back to
The top line must match the assistant you just added:
If it shows anything else, or you did not just add Splashify Pro to an assistant yourself, click Cancel. Never allow a link someone sent you.
Allow
Click Allow. You see Connected, and the page takes you back to your assistant by itself. If it does not, click Continue. Your assistant is now connected, and we email the account owner which assistant was connected and what it can do.
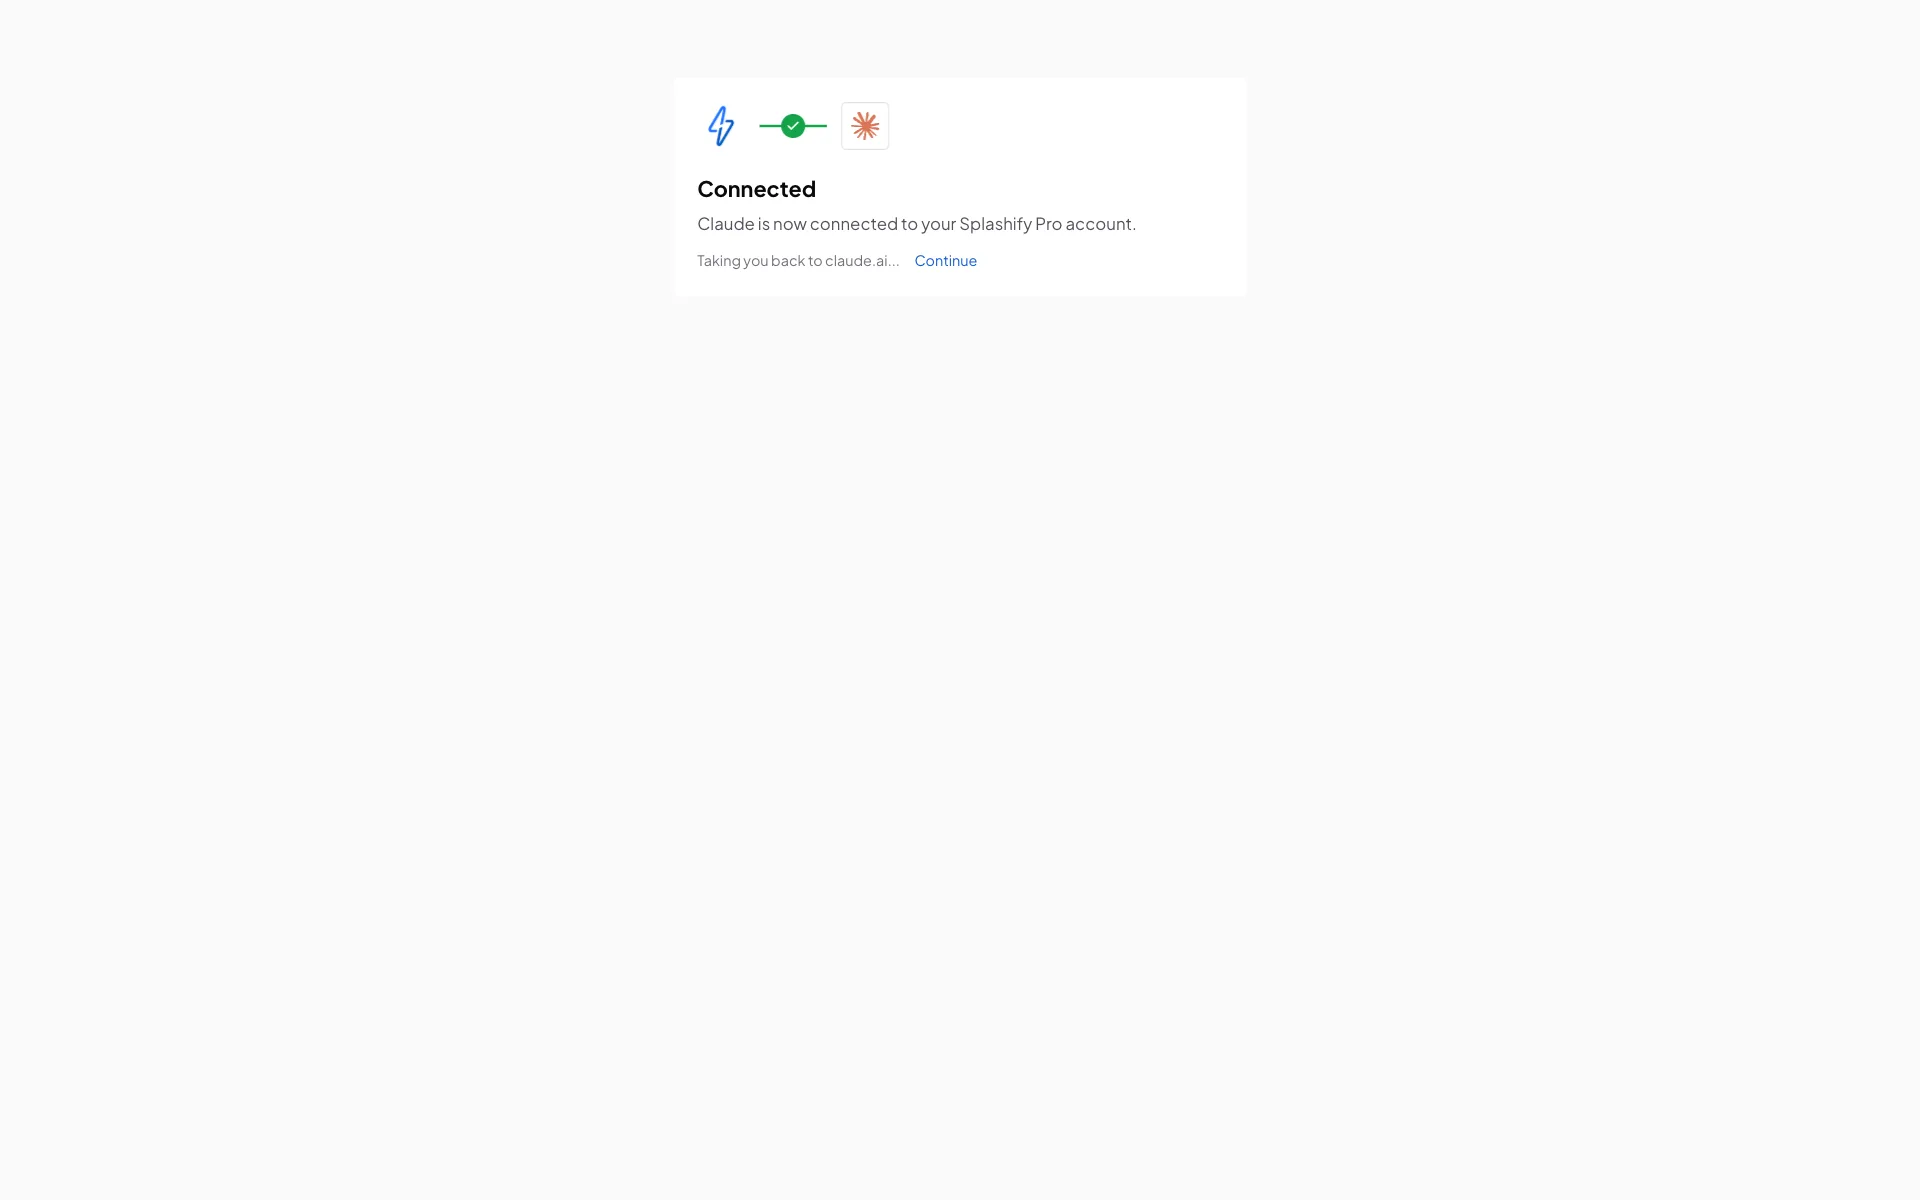
The assistant now shows in Settings > Connected apps with an AI assistant label. To remove it later, see Remove an assistant.